
Image to Code Simplified Your AI Development Guide
Image to Code Simplified Your AI Development Guide
For years, the leap from a static design to a living, breathing application was a slow, manual grind. Developers would get a beautiful mockup from a tool like Figma and then spend hours, sometimes days, painstakingly translating every pixel into HTML, CSS, and JavaScript. It was a tedious process, notorious for introducing tiny errors and inconsistencies that would drive both designers and developers crazy.
The whole concept of image to code completely flips that script. It uses AI to look at a design file—or even just a screenshot—and automatically generate the front-end and back-end code. This isn't about shaving off a few minutes here and there; it’s a fundamental change in how we build things.
The End of Manual UI Coding
That old, pixel-by-pixel translation from design to code was not just slow, it was a major bottleneck. A designer would pour their creativity into a perfect visual concept, only for it to be handed over for a developer to meticulously rebuild it from the ground up.
The rise of AI-powered tools like Capacity marks a real turning point. The work is no longer about manual transcription but intelligent interpretation. Instead of writing boilerplate UI code from scratch, a developer can now feed a design directly to an AI and get the foundational components back in seconds.
Bridging the Gap Between Design and Development
This new way of working does more than just speed things up—it transforms how designers and engineers collaborate. When an image becomes functional code almost instantly, the feedback loop shrinks from days to minutes.
This has a few massive impacts on how a team operates:
- Blazing-Fast Prototyping: Teams can build and test interactive prototypes at an incredible pace, getting real user feedback sooner than ever before.
- Pixel-Perfect Fidelity: The AI translation ensures the final product is a perfect match to the original design. No more of those "it didn't look like that in Figma" conversations.
- Unlocking Developer Potential: When developers are freed from the monotony of recreating UIs, they can focus their brainpower on what really matters: building complex back-end logic, optimizing performance, and tackling the big engineering challenges.
The real win here isn't just about speed. It's about reallocating your most expensive resource—developer time—from repetitive tasks to high-impact problem-solving. This is how modern teams innovate and move faster than their competition.
Let's break down how this changes the day-to-day workflow. The traditional process is linear and siloed, while the AI-powered approach is collaborative and iterative.
Manual Coding vs AI Image to Code Workflows
| Development Stage | Traditional Manual Process | AI-Powered Process |
|---|---|---|
| Initial Handoff | Designer exports assets; developer receives static images and specs. | Designer (or developer) uploads a design image or screenshot to the AI tool. |
| UI Development | Developer manually writes HTML/CSS/JS, aiming for pixel-perfect recreation. | AI generates foundational code for UI components in seconds. |
| Review Cycle | Developer deploys a staging version; designer reviews for visual accuracy. | Instant visual preview is generated alongside the code for real-time feedback. |
| Iteration | Feedback is compiled, sent back to the developer for manual code changes. | Minor tweaks are made via prompts or direct code edits; the feedback loop is immediate. |
| Developer Focus | Primarily on front-end implementation and bug fixing visual discrepancies. | Primarily on integrating components, adding logic, and building backend features. |
This table really shows the core difference: one process is a relay race, and the other is a dynamic workshop.
Ultimately, this shift makes platforms that offer seamless image to code functionality non-negotiable for modern teams. They serve as the critical bridge that turns a visual idea into a tangible, working application with astonishing efficiency. For solo creators, lean startups, and agile teams, this isn't just a nice-to-have feature; it's a core strategic advantage for building and shipping better products, faster.
How AI Is Completely Reshaping Development Workflows
The jump from hand-coding every user interface to using intelligent automation is a massive leap for software teams. This isn't just about moving faster; it’s about completely rethinking how products are built, tested, and shipped. For agile teams, this tech has become a secret weapon for blasting through prototypes and dramatically shrinking time-to-market.
The strategic upside is real and measurable. Using image to code tools, teams are running faster iteration cycles and nailing perfect design fidelity every time. It also pulls designers deeper into the development process, giving them a more direct hand in the final product and creating a far more cohesive workflow.
From Hours of Tedium to Minutes of Polish
Think about your team building a new user dashboard. The old way? A designer polishes off a mockup in Figma, then a front-end developer hunkers down for the next two days, painstakingly translating every last pixel into React code. It's slow work, and it’s almost guaranteed to have small, frustrating inconsistencies.
Now, let's replay that with an AI-powered tool. The designer’s mockup gets uploaded, and the AI spits out the foundational React components in minutes. The developer’s job instantly transforms from a manual transcriber to an expert reviewer and integrator. They can get straight to the good stuff: connecting those components to real data. You can see how that part of the process works in our API integration tutorial.
The core benefit here is a dramatic shift in focus. Instead of burning valuable engineering hours on repetitive UI tasks, developers can dedicate their brainpower to building a rock-solid back-end, optimizing application performance, and untangling complex business logic.
This isn't just a minor tweak—it's a major evolution in how software gets made. Under the right conditions, modern AI solutions can analyze a design and generate code with an accuracy rate that tops 90%. When you consider that developers historically spent 20-40% of their time on this manual translation, the impact is clear. Companies are now reporting that front-end development time has been slashed by nearly 50%. It’s a powerful testament to how far this technology has come. You can check out the timeline of these technological advances to see the full journey.
Real-World Scenarios and Tangible Results
This isn't just theory. We see it every day. Startups are building and validating MVPs in a fraction of the time, getting their products in front of users way faster than the competition. Digital agencies are also jumping on board, delivering high-fidelity prototypes and client projects at a speed that was unthinkable a few years ago.
Here are a few ways teams are getting real, tangible value:
- Accelerated A/B Testing: Need to test a few design variations? Generate the code for multiple versions in minutes to see which one users love most.
- Rapid Component Libraries: Build out a library of reusable, on-brand components directly from a design system in record time.
- Empowering Non-Developers: Product managers and designers can generate the initial code to get a project off the ground, smashing through developer bottlenecks.
At the end of the day, the goal of converting an image to code isn't to make developers obsolete. It’s to supercharge their skills, eliminate the soul-crushing drudgery from their work, and free them up to focus on the creative, high-impact challenges that make software truly great.
Prepping Your Designs for Flawless AI Conversion
Here's a hard truth: the quality of the code you get out of an image to code converter is a direct reflection of the quality of the design you put in. It's the classic "garbage in, garbage out" principle, but for modern development. You can't just throw a messy, disorganized design file at an AI and expect a masterpiece.
A well-prepared design doesn't just produce better code; it creates a foundation for reusable, scalable, and maintainable components. When the AI can clearly see the patterns and relationships between elements, it generates a logical code structure that a developer can actually work with and build upon. It's the difference between a functional prototype and a real-world application.
The Foundation of Clean Code Is a Clean Design
To get the best possible results, you need to think beyond just the visual layer. The AI isn't just looking at what's on the canvas; it's reading the underlying structure of your design file in a tool like Figma. A chaotic file with unnamed layers and inconsistent spacing will only confuse the system, leading directly to messy, unworkable code.
Here's what I've learned are the absolute must-haves for preparing a design file the AI will love:
- A Logical Layer Structure: This is non-negotiable. Group related elements together. For instance, a "Card" component should contain its image, title, text, and button all nested within a single, clearly named frame. This tells the AI these elements are a single unit.
- Consistent Naming Conventions: Get into the habit of naming everything with intention. Ditch the generic
Rectangle 21orGroup 148for descriptive names likebtn-primaryorcard-header. These names often directly influence the class names in your final CSS. - Embrace Auto Layout and Constraints: In Figma, using Auto Layout is your best friend. It defines how elements should respond and resize, which the AI translates into flexible CSS properties like Flexbox or Grid. This is the key to getting a responsive layout right out of the box.
- Define a Design System (Even a Mini One): Consistency is everything. Establish your core colors, fonts, and spacing values as styles. When the AI sees you’ve used your
Primary-Bluecolor style in ten different places, it’s smart enough to create a reusable CSS variable for it.
A well-organized design system is no longer just a "nice-to-have" for design teams. For AI code generation, it is a functional requirement for producing high-quality, reusable code. It's the blueprint the AI uses to build your application.
Defining Component States and Interactions
A static design is just a picture. To create a real, interactive application, you have to show the AI how your components are supposed to behave. Thankfully, modern design tools make this easy by allowing you to define different states and variants for your components.
Make sure you create variants for the most common interaction states:
- Hover: What happens when a user's mouse glides over a button?
- Active/Pressed: How does it change the moment it's clicked?
- Disabled: What does it look like when an action isn't available?
By visually defining these states right inside your design file, Capacity’s AI can interpret them and automatically generate the corresponding CSS pseudo-classes (:hover, :active, etc.). This one step saves a ton of time you'd otherwise spend manually coding these basic interactions, and it’s a crucial part of turning a flat image into a dynamic web app.
If you're interested in taking your skills beyond the design-to-code process, our guide on how to build an app without coding provides a much broader look at the entire creation journey.
Alright, let's move past the theory and get our hands dirty. This is where you'll see exactly how Capacity's AI can take a polished design and spin it up into a fully functional, full-stack application.
The whole process is surprisingly intuitive. It takes what used to be a complex, multi-stage engineering task and breaks it down into a few logical steps. To show you how it works, we’ll walk through a common scenario: building a user dashboard from scratch. This is a perfect example of converting a static image to code.
The journey starts when you import your design, probably straight from Figma. As soon as it's uploaded, Capacity’s AI immediately gets to work, performing an initial analysis. It doesn't just see pixels—it actually interprets the structure of your design, identifying individual components like buttons, input fields, and navigation bars.
This visual shows you just how straightforward the workflow is, from the moment you upload your design to when you export the code.
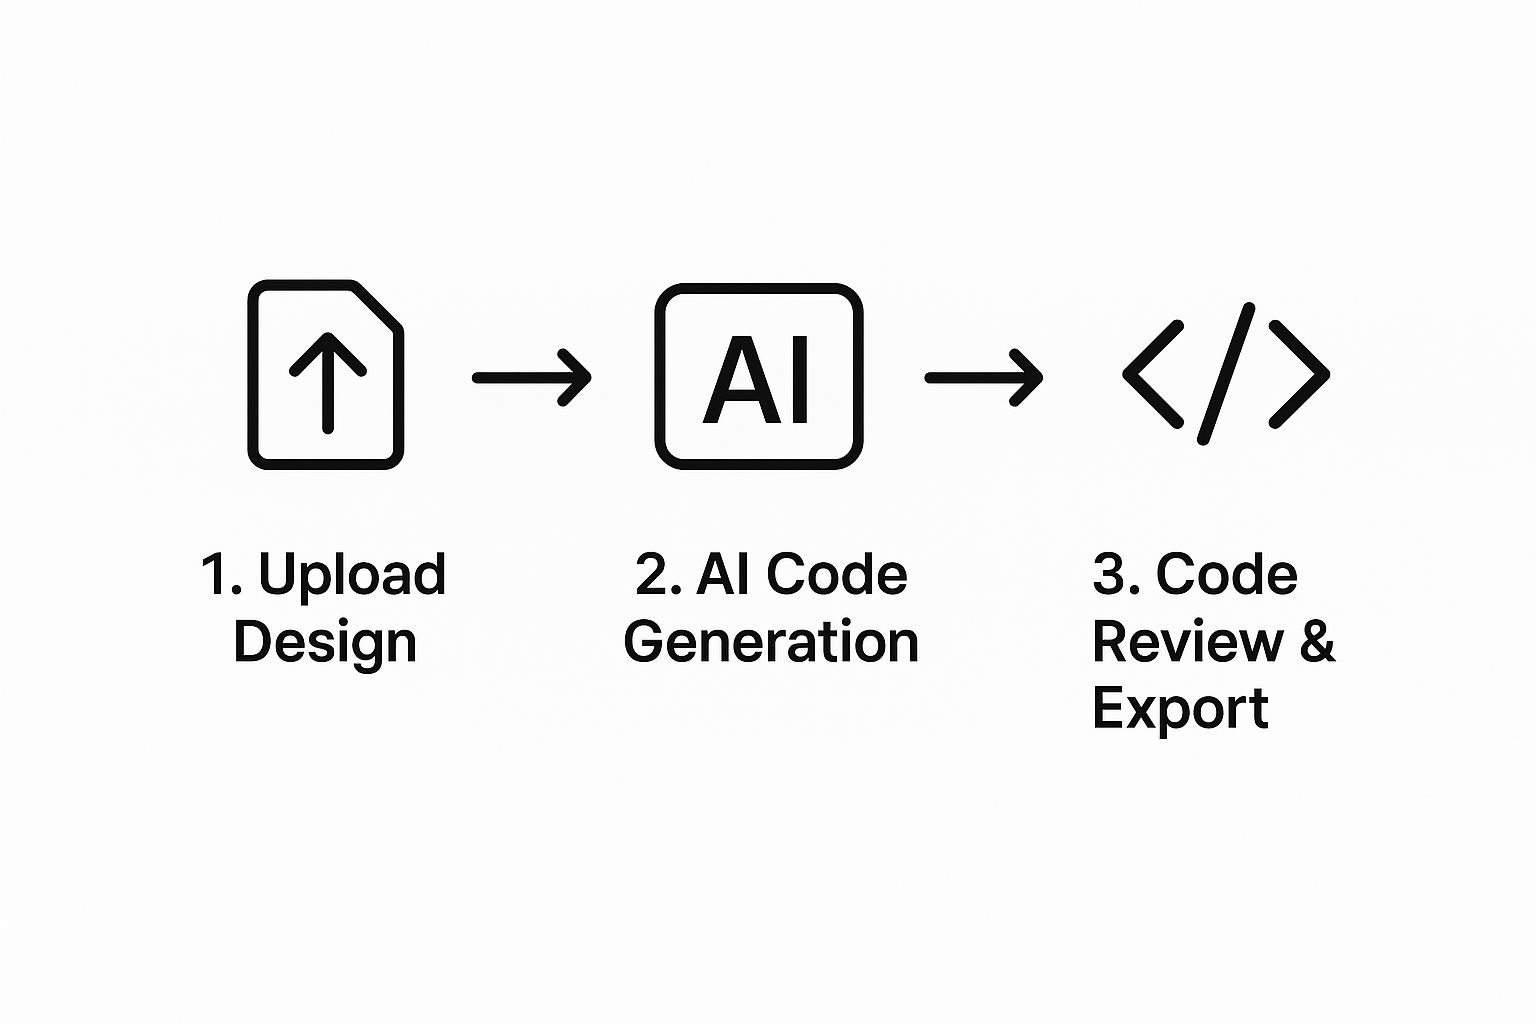
As you can see, the process flows smoothly from a creative asset to tangible, developer-ready code with very little friction.
From Design Components to Code Logic
Once the initial scan is done, Capacity shows you its interpretation of your design. This is your chance to review the components it identified and confirm they do what you intend them to do.
Going back to our user dashboard example, this is the point where you’d double-check that the "Profile Picture" is tagged as an image, "Save Changes" is a button, and the "Email" field is a text input. Simple.
But here’s where the real magic happens. Capacity doesn't just spit out some HTML and CSS. It builds the front-end and back-end at the same time.
- Front-End Generation: You get to pick your framework of choice, like React or Vue. The AI then writes clean, idiomatic code for every component, making sure to respect the hierarchy and structure you laid out in your design file.
- Back-End Generation: While it's building the UI, it's also scaffolding a Node.js back-end. For our dashboard, this might mean generating API endpoints for fetching user data (
/api/user/:id) and another for updating it (PUT /api/user/:id), complete with the basic logic.
This parallel process is a massive time-saver. Instead of having a front-end dev build the UI and then wait around to hook it up to a back-end built separately, Capacity constructs the entire thing in one go. It handles the tedious wiring from the very beginning, giving you a solid foundation to build upon.
The key takeaway here is the full-stack nature of the generation. It’s not just about creating a pretty interface; it’s about building the complete, connected architecture a real application needs to function.
Reviewing and Exporting Your Code
After the AI has generated the initial application, you move into the review stage. Capacity gives you a live preview of the app running right next to the generated code.
This side-by-side view is great because it allows for immediate feedback. You can see the impact of any changes instantly, letting you make quick adjustments before you export anything.
This is also where a developer can step in to make tweaks, refine the logic, or add custom functionality. For instance, you could add form validation to the user dashboard or integrate a third-party service. The platform is built for this kind of human-in-the-loop collaboration, giving you total control over the final output.
Once you’re happy with everything, you can export the entire codebase—front-end, back-end, and all. It's ready to be deployed or slotted into an existing project. This seamless transition from image to code, and then to a production-ready application, is what makes this approach so effective.
Refining and Optimizing Your AI-Generated Code

Let's be real—the code that comes out of an image to code tool is an incredible head start. It often gets you 90% of the way to the finish line, which is a massive win. But that last 10%? That’s where you, the developer, come in to turn impressive output into bulletproof, production-ready software.
This is where your expertise truly shines. The AI gives you a solid foundation, but it’s your job to refine it, optimize it, and make sure it plays nicely with your existing projects. Think of yourself less as a builder from scratch and more as a master finisher—the one who adds the polish that separates good code from great software.
Ensuring Code Is Production Ready
Before you even think about deploying, that generated code needs a thorough once-over. Performance is one of the first things I check. While AI-generated code is usually pretty efficient, you can almost always find opportunities for optimization. Look for things like lazy-loading images or code-splitting components to shave precious milliseconds off those initial page loads.
Accessibility is another absolute must. This is one area where a human review is non-negotiable to ensure the app is fully compliant with the Web Content Accessibility Guidelines (WCAG). Specifically, you'll want to check:
- Proper ARIA Roles: Are all interactive elements correctly identified for screen readers?
- Sufficient Color Contrast: Does all text meet the required contrast ratios against its background?
- Keyboard Navigation: Can a user access every single feature using only their keyboard?
These might seem like small tweaks, but they make a world of difference for creating a truly inclusive user experience.
Think of the AI's output as a well-framed house. It's structurally sound, but you're the one who comes in to wire the electrical, install the plumbing, and paint the walls. You add the critical systems that make it a livable home.
Integrating and Testing New Components
Once the code is polished, it’s time to integrate it into your larger codebase. This step requires a bit of finesse to avoid conflicts with existing styles or application logic. I've found that using scoped CSS or CSS Modules is a lifesaver for preventing style collisions, while careful state management ensures your new components don't cause chaos.
If you’re working in React, this is a great time to evaluate state management. For local component state, hooks like useState and useEffect are perfect. But if you’re dealing with more complex, global state, you might need to integrate a more robust solution like Redux or Zustand.
Finally, no component is ready for the wild without proper testing. Automated tests are your safety net for long-term stability.
- Unit Tests: Make sure individual components render correctly when fed different props.
- Integration Tests: Confirm that groups of components work together just as you'd expect.
By writing comprehensive tests, you build confidence that future updates won't unexpectedly break something. If you want to go deeper on this, there are some great software testing best practices that apply perfectly here.
This whole refinement stage is also a fantastic feedback loop. When you spot patterns where the AI could improve—maybe its naming conventions are a bit off or its component structure isn't ideal—you can tweak your prompts or designs for better results next time. This cycle of generating, refining, and giving feedback is how you truly master the image to code workflow.
Image to Code: Your Questions, Answered
Jumping into a new way of working always brings up questions. When it comes to turning an image into code, I've noticed developers and designers tend to have the same curiosities about what's possible, where the limits are, and how to get the best results.
Let's clear things up and tackle some of the most common questions I hear.
Can It Really Handle Complex Designs?
This is probably the question I get asked most, and the answer is a confident yes—with one important caveat. Modern AI, like what we've built into Capacity, is surprisingly skilled at interpreting complex layouts with nested components, overlapping elements, and intricate designs. It can look at something like Figma's Auto Layout and translate it directly into responsive CSS, like Flexbox or Grid.
However, the AI's success is a direct reflection of your design file's organization. Think of it this way: garbage in, garbage out. A messy design with unnamed layers and inconsistent spacing will inevitably produce messy, hard-to-manage code.
On the other hand, if you hand it a clean, logically structured design, you'll get clean, logical code back. The AI is smart, but it's not a mind reader.
What Is the Accuracy of the Code?
Code accuracy has improved dramatically over the last couple of years. For a well-prepared design, many tools now claim accuracy rates north of 90% when translating the visual UI. This means the code you get will be a near pixel-perfect match to your Figma or Sketch file.
So what about that last 10%? That's usually the minor stuff a developer would be tweaking anyway—things like adjusting for obscure browser compatibility issues, fine-tuning an animation's easing, or optimizing for a very specific performance metric. The goal isn't to make the developer obsolete; it's to get rid of their repetitive, low-value work.
The most important thing to understand is that image to code is a powerful starting point, not a magic "one-click" final product. It gives you a massive head start, generating a solid foundation that a developer can then refine, optimize, and build upon.
What Kind of Code Does It Generate?
This really depends on the platform, but the best tools like Capacity are full-stack. This is a huge deal. You’re not just getting some static HTML and CSS dumped on you.
You can typically choose your front-end framework of choice, like React or Vue, and the system will generate idiomatic, component-based code that feels like a human wrote it.
But the real game-changer is that it also scaffolds the back-end. This can include:
- A Node.js server
- API endpoints wired up to your components
- Basic database schemas to get you started
This full-stack approach is what separates today's tools from the old front-end-only converters. You get a connected, functional application foundation right out of the gate, not just a pretty but dead webpage. It’s a genuine workflow accelerator.
Ready to stop coding UIs by hand and start shipping faster? Give Capacity a try and see how our AI can turn your designs into full-stack applications in minutes. Get started for free on capacity.so and experience the future of development for yourself.