
How to Upload a Project on GitHub Your First Steps
How to Upload a Project on GitHub Your First Steps
Feeling a little intimidated by GitHub? You're not alone. The whole process can seem complicated at first, but it boils down to this: you create a repository online, get your project files ready on your own computer using Git, and then "push" your code up to GitHub's servers.
Think of it as creating a cloud backup for your code that also happens to track every single change you make along the way.

Why GitHub is Essential for Modern Developers
Before we jump into the step-by-step, let's talk about why learning how to upload a project on GitHub is way more than just a technical task. It’s a foundational skill in the software world. GitHub isn't just a place to dump files; it's the central hub for collaboration, version control, and showing off your work to potential employers or partners.
Since it launched back in 2008, GitHub has exploded into the world's largest platform for software development, home to a community of around 100 million developers. That number alone should tell you something about its importance. If you're curious about the scale of it all, check out these insightful GitHub statistics and trends.
Core Benefits of Using GitHub
Getting comfortable with this platform unlocks a few key advantages that will seriously speed up your growth as a developer. Here's what you gain:
- Version Control: GitHub is built on Git, a system that tracks every single change made to your code. If you accidentally introduce a bug, you can just roll back to a previous, working version. It’s a lifesaver.
- Collaboration: It’s designed to let multiple developers work on the same project at the same time without tripping over each other's changes.
- Portfolio Building: A public GitHub profile is basically a living, breathing resume. It showcases your coding skills, your project history, and your ability to work with the tools real companies use every day.
The real power of GitHub is how it turns a solo coding project into a collaborative and maintainable piece of software. It’s the difference between writing in a private journal and publishing a book for the world to see and contribute to.
Whether you're building a massive application or just dipping your toes into the world of no-code app development, understanding version control is non-negotiable. By learning to upload your project, you’re taking the first real step toward adopting a professional workflow that will benefit you for your entire career.
Setting Up Your GitHub Repository
Before you can push any code, you need a place for it to live on GitHub. This digital home is called a repository, or "repo" for short. It’s more than just a folder for your files; it’s where you’ll store your project’s entire history, track every change, and collaborate with others.
Getting this initial setup right is your first win. It lays the foundation for everything that comes next.
To get started, head over to GitHub, click the + icon in the top-right corner, and select "New repository." You'll land on the main setup page.
Think of this page as your project's command center. The choices you make here will define how your project is stored and shared.
Naming and Describing Your Project
First up is the repository name. You want something descriptive but concise. Think personal-portfolio-site or nodejs-api-boilerplate. A clear name helps everyone—including your future self—understand what the project is about instantly.
Next, add a short description. This is your project's elevator pitch. Explain what it does and maybe mention the main technologies used. This little sentence appears right under your repo name and is huge for discoverability.
You’ll then have to decide between a Public or Private repository.
- Public repos are visible to the entire world. This is perfect for open-source work or portfolio pieces you want to show off.
- Private repos are only visible to you and any collaborators you explicitly invite. Use this for proprietary code or projects that aren't ready for public eyes.
If you're looking for more tips on getting started, Mergify has a great walkthrough on how to start a project on GitHub.
Now, let's look at the other important settings you'll see on this page.
Key Repository Settings for Your First Project
When you create a new repository, GitHub presents you with a few initialization options. While they might seem minor, they can save you a lot of hassle down the road. Here's a quick rundown of what they are and my recommendations for beginners.
| Setting | What It Does | Beginner Recommendation |
|---|---|---|
| Add a README file | Creates an empty README.md file in your repository. This file is where you'll write instructions and project details. |
Always check this. It makes it much easier to clone the repo to your local machine right away. |
| Add .gitignore | Creates a .gitignore file, which tells Git which files or folders to ignore (e.g., node_modules, secret keys). |
Highly recommended. Use a template for your programming language (like "Node" or "Python") to keep your repo clean from the start. |
| Choose a license | Adds a LICENSE file that specifies how others can use your code. |
Optional for now, but crucial if you plan to share your code publicly. You can always add this later. |
These settings aren't just checkboxes; they are the first steps in creating a well-structured and professional project.
Pro Tip: Always, always initialize your repository with a README file. It acts as the front page for your project, and having it from the start simplifies the process of getting the repository onto your local machine.Choosing a .gitignore template is another pro move. Forgetting to ignore the massive node_modules directory in a JavaScript project is a classic rookie mistake. Using a template from day one keeps your repository lean and focused only on the code you wrote. A clean setup is just as important as the code itself—it’s a core principle when planning the architecture for a web application.
Alright, you’ve got your shiny new GitHub repository sitting up in the cloud. Now it's time to connect it to the project files living on your own machine. This is where we bridge the gap between your local work and its online home, and we'll do it using the command line—a tool you'll come to rely on. Don't sweat it if the terminal seems a bit scary; I'll show you the exact commands to get it done.
First things first, pop open your terminal (or command prompt on Windows) and use the cd command to navigate right into your project's main folder. Once you’re in the right directory, we can kick things off.
Turning Your Project Into a Local Git Repository
This is the moment you officially tell Git, "Hey, I want you to start keeping an eye on this folder." The command couldn't be simpler. Just type:
git init
When you run that, Git creates a hidden .git folder right inside your project directory. This little folder is the brain of the operation. It's where Git stores all the history, metadata, and snapshots of your project. You've just transformed a standard folder into a Git-powered repository, ready to track every change you make.
Now that your local project is under Git's watch, the last piece of the puzzle is to tell it where its online counterpart lives on GitHub.
Adding Your Remote Origin
You need to create a link between the files on your computer and that empty repository you made on GitHub. We do this by adding what's called a "remote."
A remote is basically just a nickname for a URL. The standard, almost universal name for the main remote repository is origin.
To set it up, you'll use the git remote add command. The full command is conveniently waiting for you to copy on your GitHub repository page. It'll look something like this:
git remote add origin https://github.com/your-username/your-repository-name.git
This one command forges that critical link. It tells your local repo, "Whenever I talk about 'origin', I'm talking about this specific URL on GitHub."
By setting up 'origin', you create a permanent, named connection. This makes pushing your changes up and pulling updates down much cleaner because you won't have to type out that long URL every single time.
And that's it! Your local project now knows exactly where to send its files. You're officially set up and ready to start staging and committing your work for its journey to the cloud.
How to Stage, Commit, and Push Your Code
Alright, your local project and its online GitHub counterpart are officially connected. Now comes the fun part: the core workflow you'll use every day to save and upload your changes.
Think of it as a three-step rhythm: add, commit, and push. This sequence is the absolute heartbeat of working with GitHub, and getting this down is the key to mastering how to get your projects online.
First things first, you need to tell Git which specific files you want to save in your next update. This is called staging. You’ll use the git add command for this.
For your very first upload, you'll probably want to include everything. The command for that is simple:
git add .
That little period . is a handy shortcut that means "all files and folders in my current spot." You could also get specific and add files one by one, like git add index.html style.css. Staging is like packing a box before you tape it shut—it lets you group related changes together.
Committing Your Staged Changes
Once your files are staged, it's time to lock in those changes with a descriptive message. We call this a commit. A commit acts like a permanent snapshot of your project at that very moment.
To make a commit, you'll run this in your terminal:
git commit -m "Initial commit of my portfolio website"
The -m flag just means "message." Honestly, writing clear, helpful commit messages is one of the best habits you can build. It creates a clean, readable history for your project, making it super easy to look back and see what changed and why.
A great commit message explains the why behind a change, not just the what. Instead of "Fixed bug," try something like, "Fix: User login fails when password contains special characters." This tiny bit of extra effort pays off big time for you and anyone else who might work on the project.
Pushing Your Code to GitHub
The final step is to send all your committed changes from your computer up to your GitHub repository. This is what the git push command is for.
Since this is the very first time you're pushing, you need to be a little more specific and tell Git exactly where to send the code. You'll specify the remote's name (origin) and the branch name (which is usually main these days):
git push origin main
This command basically says, "Push my committed changes to the remote I've named 'origin' and put them on the 'main' branch."
Go ahead and run that. Now, refresh your GitHub repository page in your browser. Boom! All your project files should be there, live and online. You've just contributed to a massive global developer community. The sheer volume of git pushes happening every day shows just how many projects are actively being updated worldwide. You can learn more about these global coding trends from GitHub's data.
This whole process is visualized below.
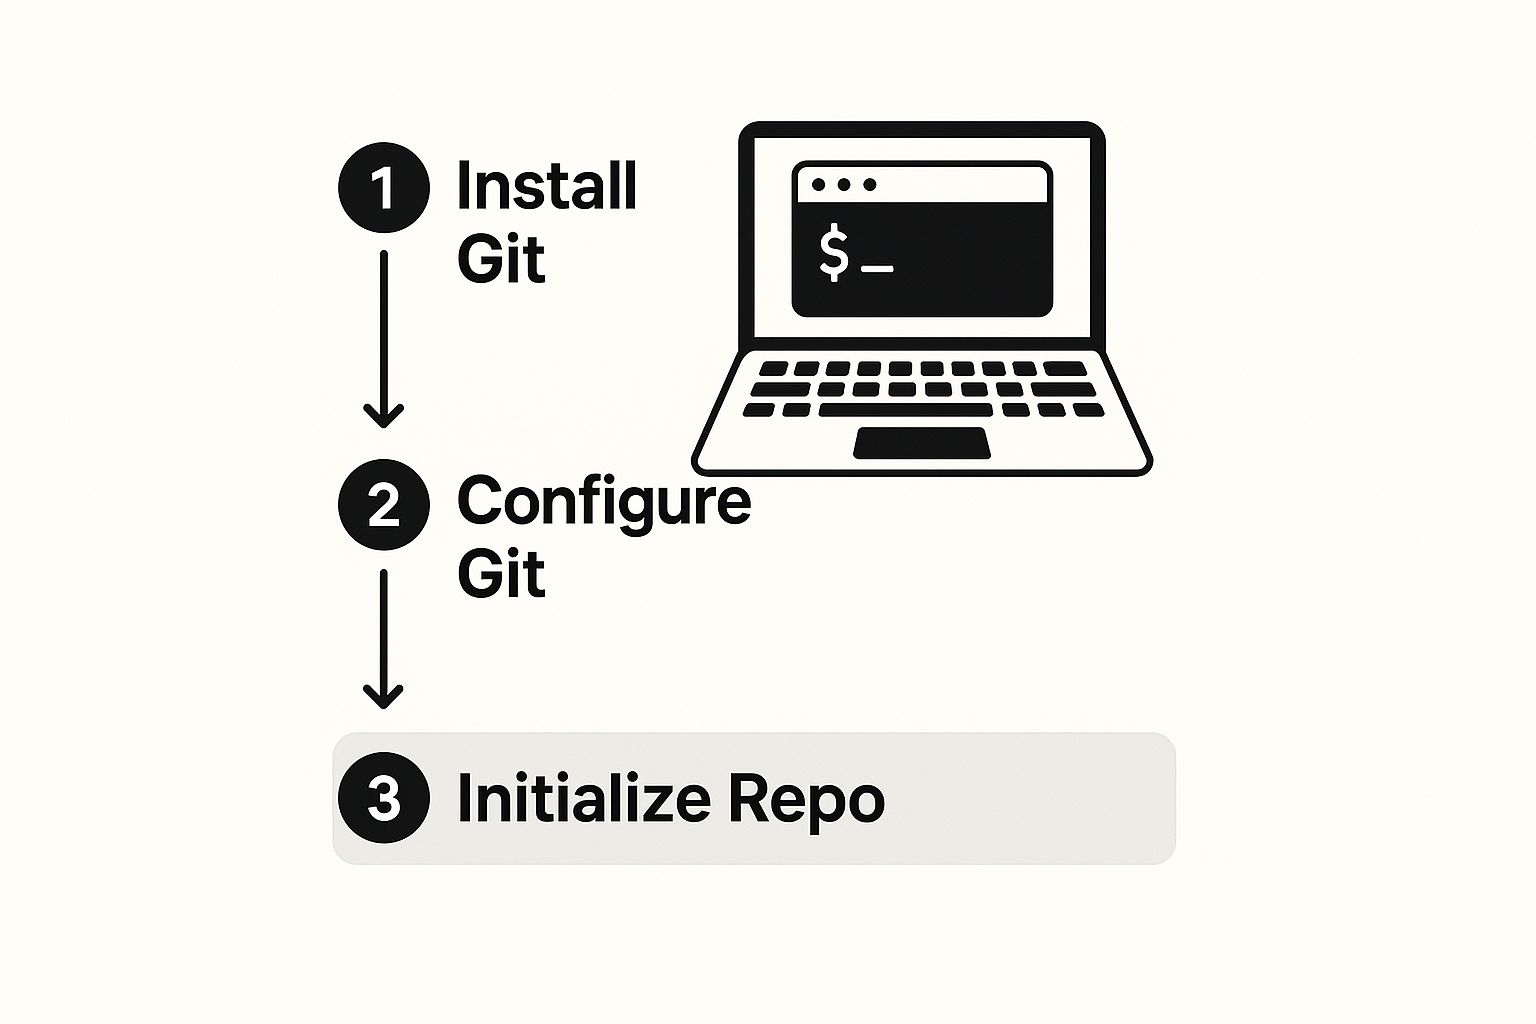
As you can see, the workflow is a straight shot from getting your local files ready to pushing the final code online, creating a perfect bridge between your machine and the cloud.
Making Your Project Stand Out on GitHub
Pushing your files to GitHub is just the first step. The real art lies in turning that folder of code into a polished, professional project that actually invites people in—whether it's to collaborate or just to see what you're capable of.
Think of your project's README.md file as its digital front door. It’s the very first thing anyone sees. A truly great README doesn't just explain what the code does; it shows people how to get it up and running on their own machine.
Crafting an Effective README
A solid README is what separates a confusing mess of files from a genuinely useful tool. To give your project clarity and encourage others to dive in, make sure you cover these bases:
- A Clear Title and Description: Get straight to the point. What is this project, and what problem does it solve?
- Installation Instructions: Give them the exact, step-by-step commands needed to set everything up.
- Usage Examples: Nothing beats seeing the code in action. Show off what it can do with a few clear examples.
Once your project is looking good, you can actually see who's checking it out. GitHub has built-in traffic data that shows you cool metrics like unique visitors and which files are most popular. Anyone with push access can peek at this data to get a sense of the project's reach.
Your repository isn't just a code backup; it's a living, breathing piece of your portfolio. A well-documented project signals a real commitment to quality and attention to detail.
Working Safely with Branches
As your project gets bigger, you’ll inevitably want to add new features or squash some bugs. The last thing you want to do is break your main, working code in the process. This is exactly what branches are for. A branch is basically a safe, isolated copy of your project where you can experiment without fear.
This simple practice is key to keeping your main codebase stable and reliable. For any project you plan to work on long-term, especially with others, you should also be thinking about maintainability. Adopting smart strategies for reducing technical debt will keep your code clean and manageable for the long haul.
By putting these simple practices into play, you'll make your GitHub project one that truly stands out from the crowd.
Got Questions About Your First GitHub Upload?
Even with a perfect guide, you're bound to hit a snag or two. It's totally normal. Knowing the common tripwires ahead of time can save you a mountain of frustration, especially when you're figuring out how to get a project on GitHub for the first time. Let's walk through the questions that come up most often.
A big one is the dreaded 'permission denied' error you might see during a git push. This almost always boils down to one thing: your computer isn't properly authenticated with your GitHub account.
The modern way to fix this is by using a Personal Access Token (PAT) instead of your password. GitHub phased out password authentication for command-line stuff, so a PAT is now the standard.
Keeping Your Project Updated (And Other Ways to Do It)
So, you’ve pushed your first version. What happens when you need to upload updates? It's simple—you just repeat the core workflow you've already learned.
- Stage your new changes with
git add . - Commit them with a fresh message using
git commit -m "Your update message" - Push them up to your repository with
git push origin main
This cycle will quickly become second nature.
But what if the command line isn't your cup of tea? No problem. You can always upload files directly through the GitHub website or use the GitHub Desktop app, which gives you a nice graphical interface to work with. While these methods are great, getting comfortable with the command line gives you way more control and is a standard skill in the dev world.
The key takeaway here is that your first upload isn't a one-and-done deal. It’s the start of a continuous cycle of improvements, updates, and fixes—all neatly tracked and managed by Git.
With every push, you also want to make sure your project stays stable. This is where solid testing comes in to prevent new bugs from slipping through. Adopting some essential software testing best practices early will keep your project healthy and manageable as it grows.
Ready to turn your idea into a fully functional application without the steep learning curve? With Capacity, you can describe your project in plain English and watch as our AI generates the code, UI, and infrastructure for you in minutes. Start building for free at Capacity.so.