
How I created an App with AI in 10 Hours With Capacity ( no code )
How I created an App with AI in 10 Hours With Capacity ( no code )
Last weekend, I built and deployed a production-ready SaaS in less time than it usually takes me to set up auth. No hand coding, no boilerplate, just AI prompts.
Normally, building a SaaS app means weeks of wiring:
- Authentication
- Database
- Payments
- Background jobs
- AI integrations
This time, I let AI do the heavy lifting.
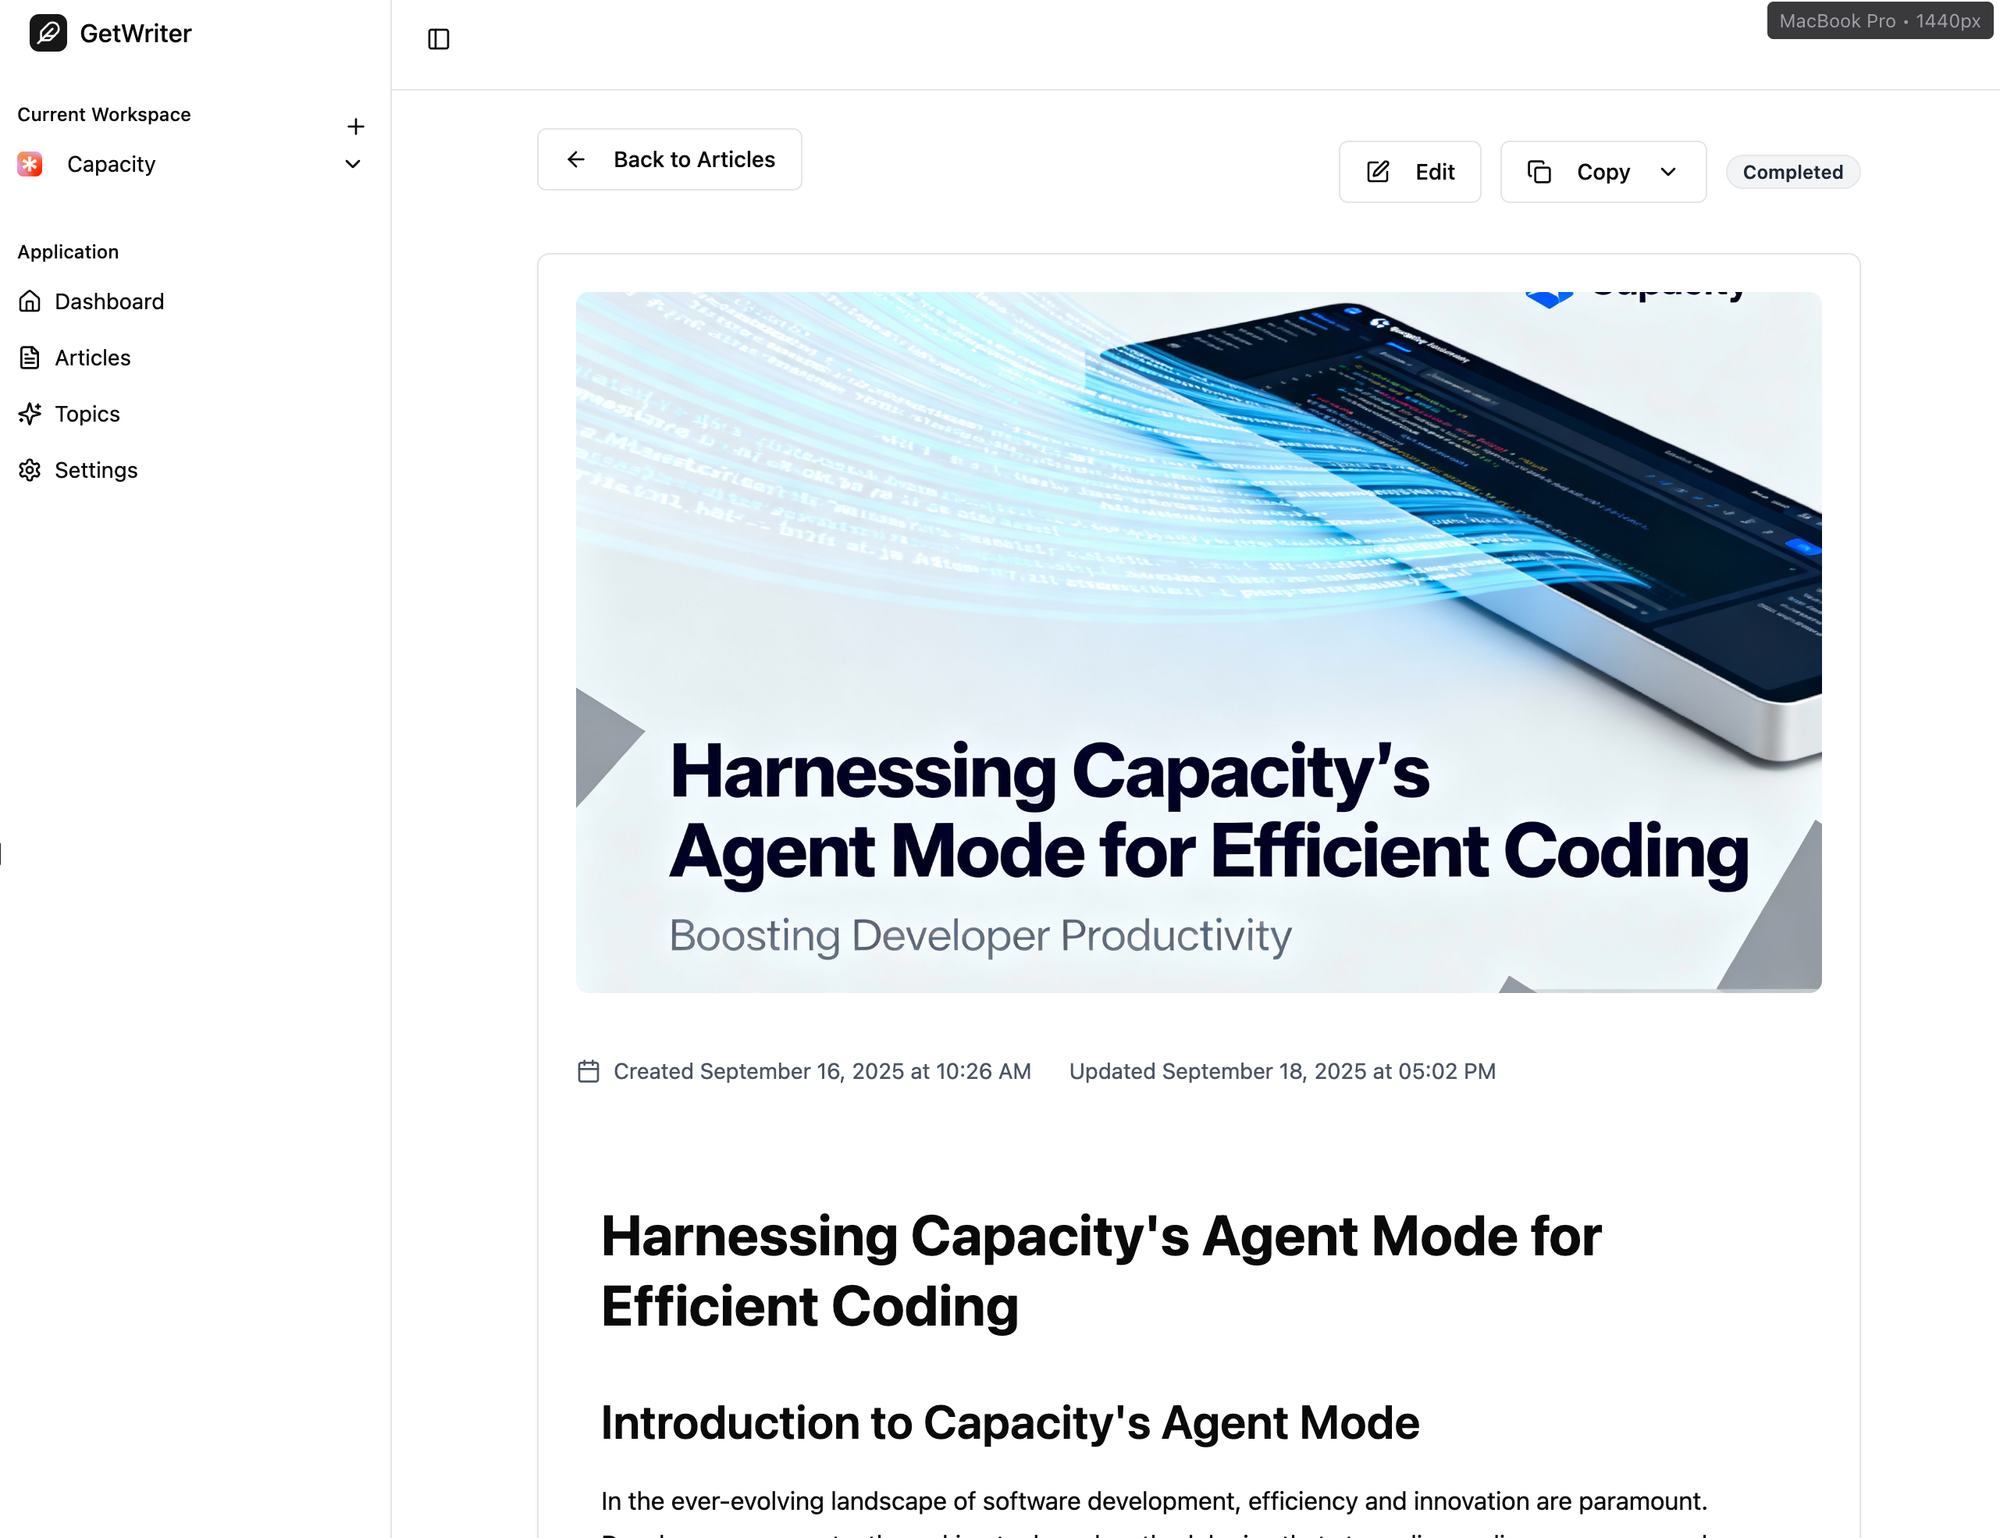
In under 10 hours, I shipped Getwriter.so, an AI SEO article generator, using nothing but Capacity.so.
Here’s the breakdown, including the prompts I actually used.
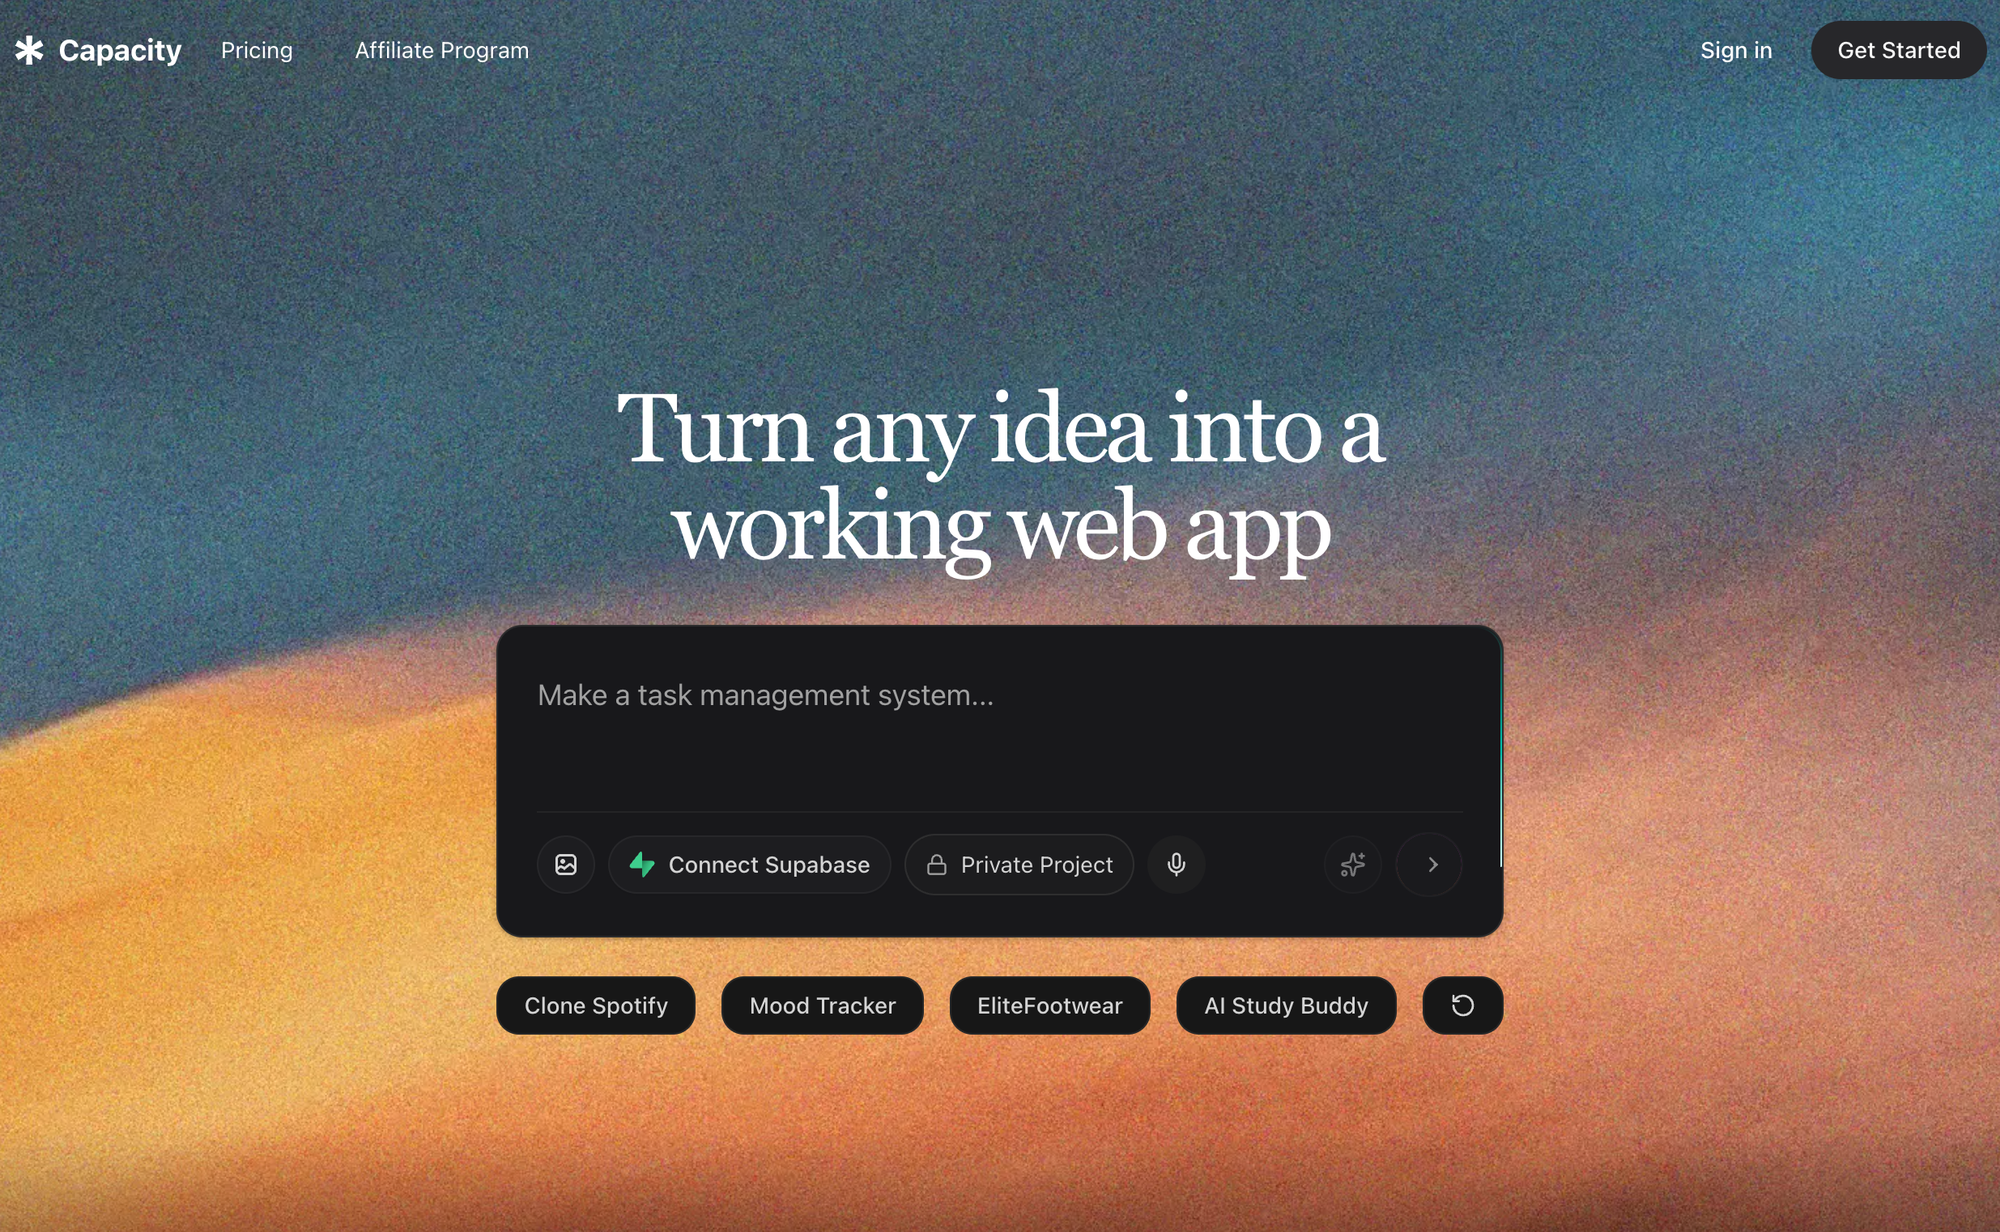
Step 1 — Landing Page First (Design Baseline)
I started with the landing page to lock in design before building features.
Prompt:
Build a landing page for an AI SEO article generator. Include a hero section, pricing, and a clear CTA button.
Capacity scaffolded:
- A Vite project
- Hero + Pricing sections with shadcn components
- Navbar & CTA
This became the design system for the rest of the app.
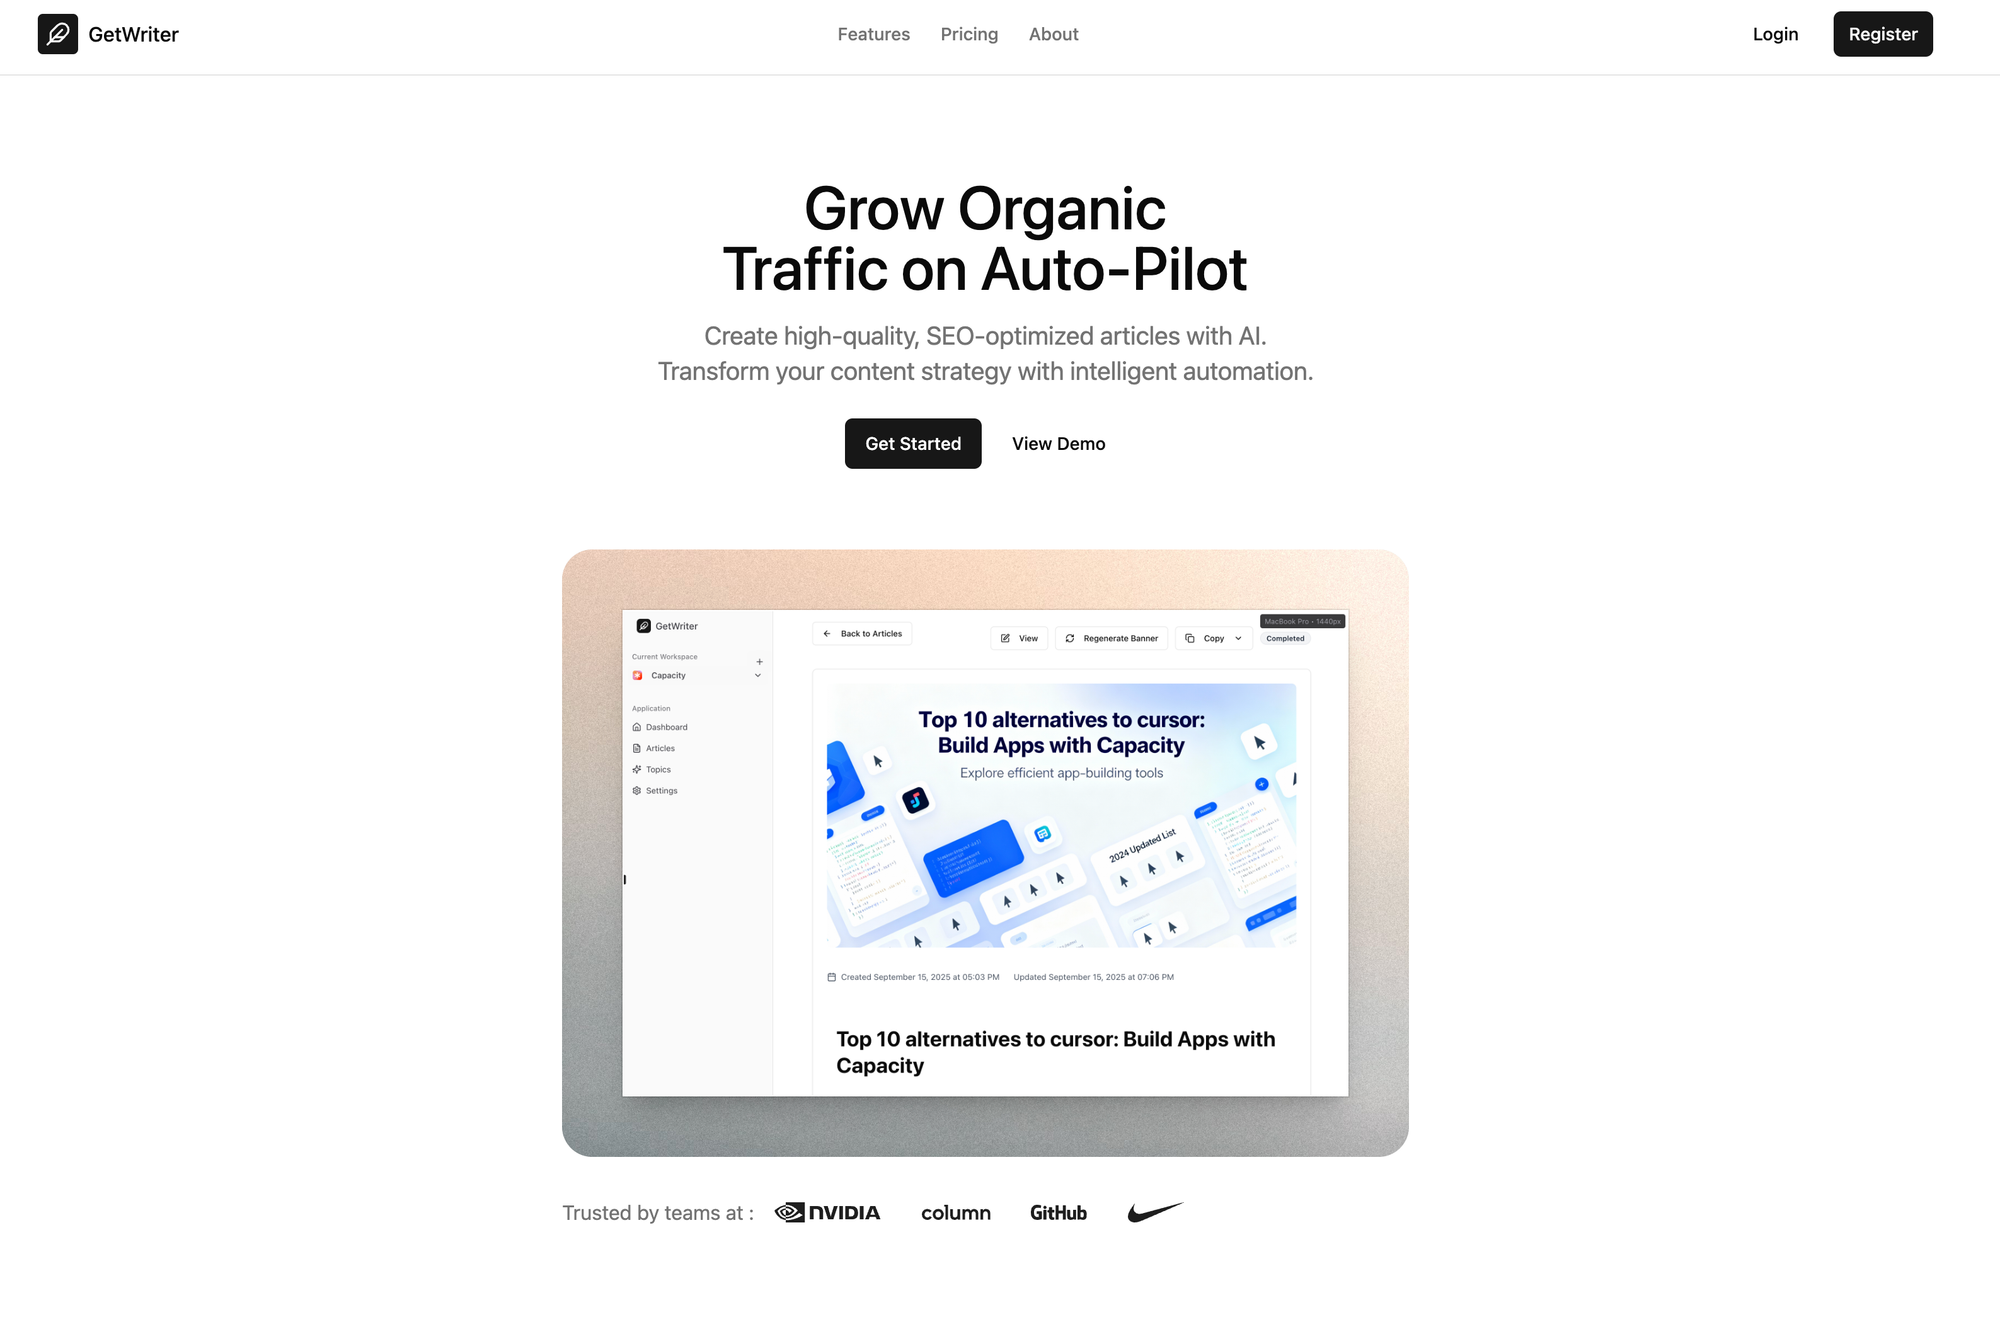
The idea here was to build the perfect landing page so the AI would build the rest of the app using the same style. And it worked.
To create those components I went on 21st.dev and copied prompts of components I liked directly into Capacity’s chat.
Step 2 — Auth + Dashboard
Next, I wanted users to sign up, log in, and land in a protected dashboard.
I started by connecting my Supabase account to Capacity using the native integration.
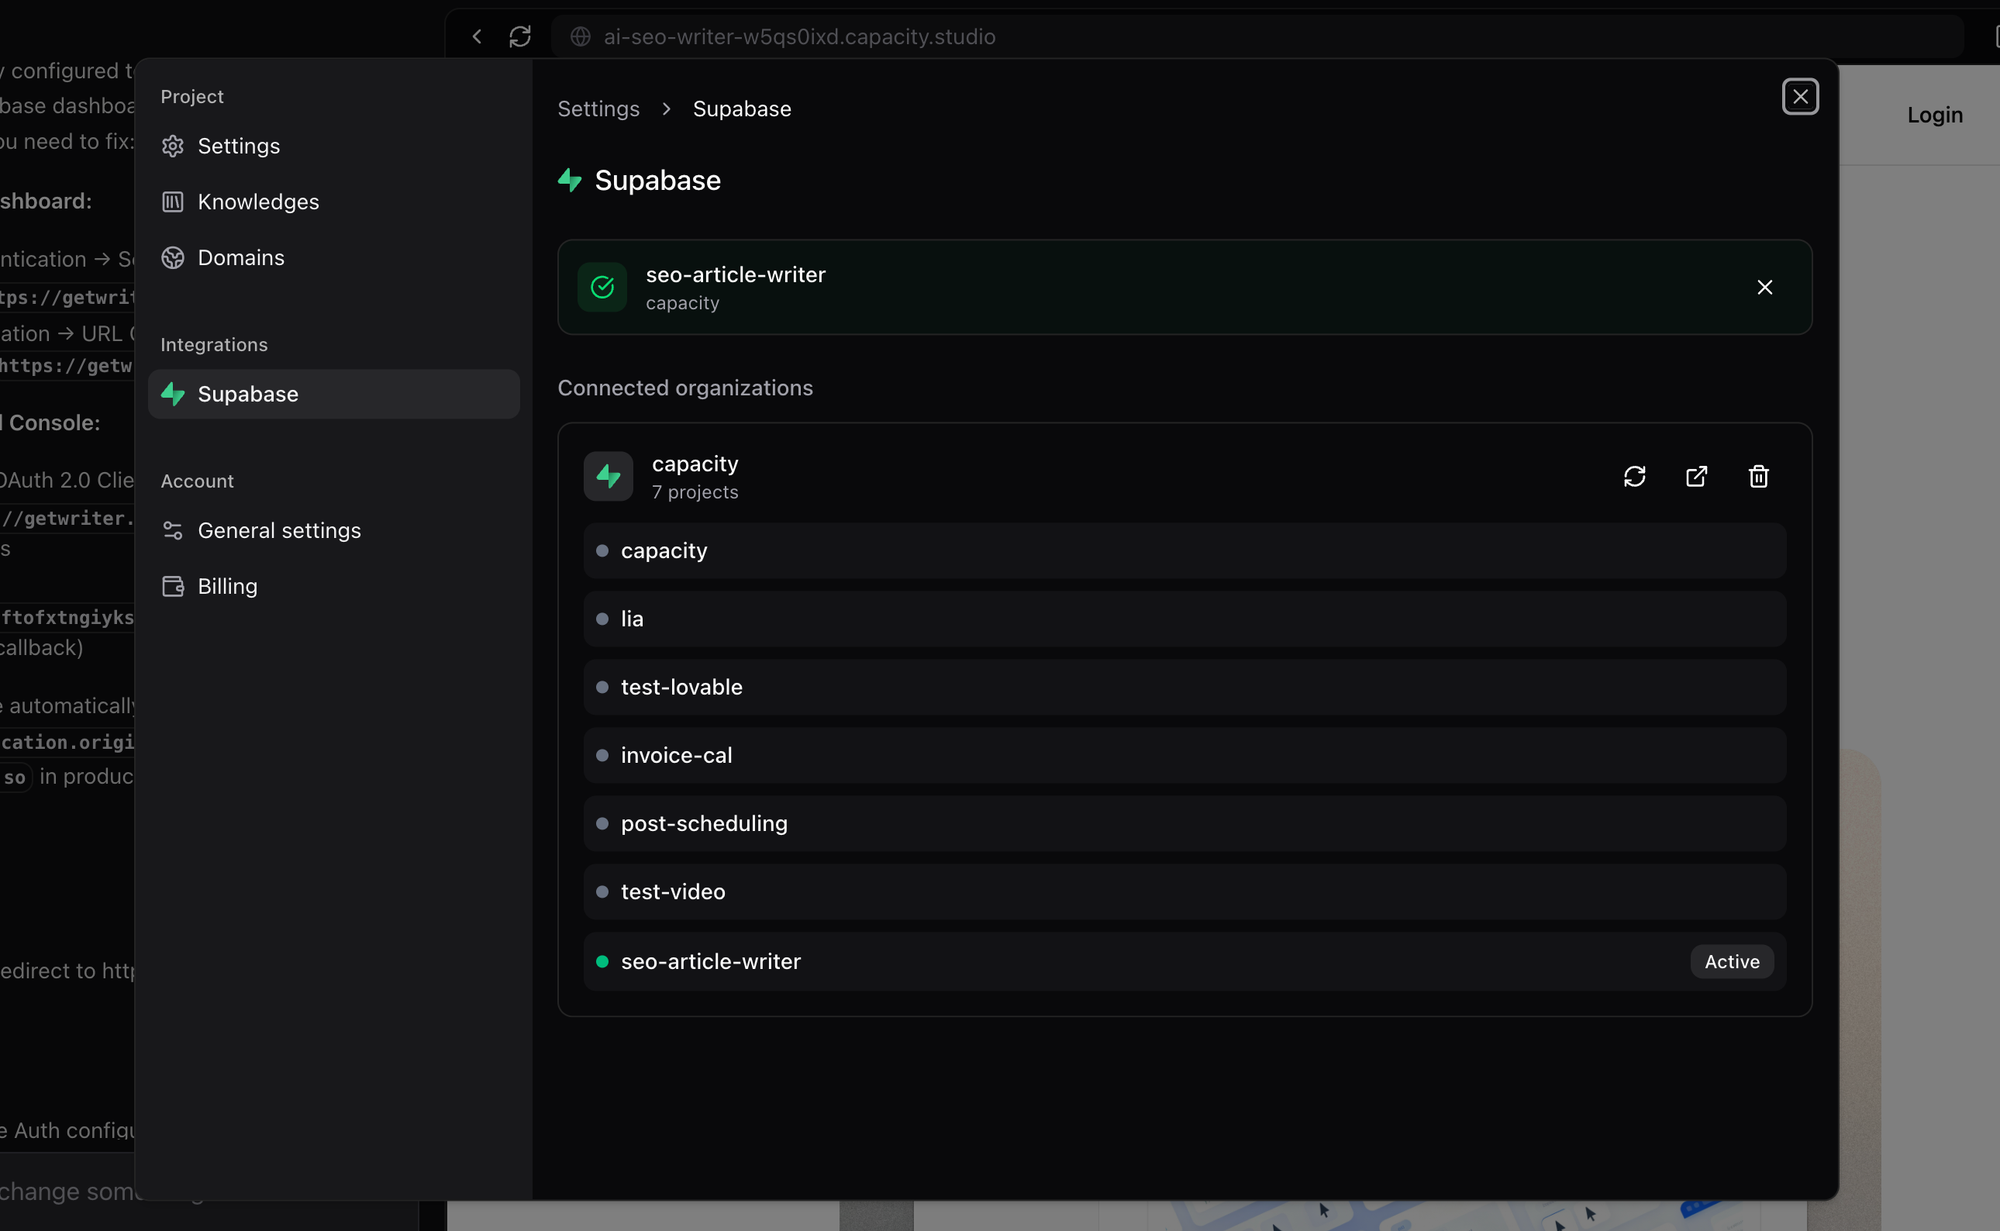
The great point here is that you just copy-paste your token and Capacity creates everything for you, including Edge functions, databases, buckets, etc.
Prompt:
Using the Supabase account connected you have access to, create an authentication flow. Add signup + login forms with email verification. After login, redirect users to a dashboard with a sidebar layout.
Capacity delivered:
- Supabase Auth integration
- Protected routes
- A dashboard scaffold with sidebar navigation
Note: I also copy-pasted the code from Shadcn authentication forms into the chat to get a slick authentication design.
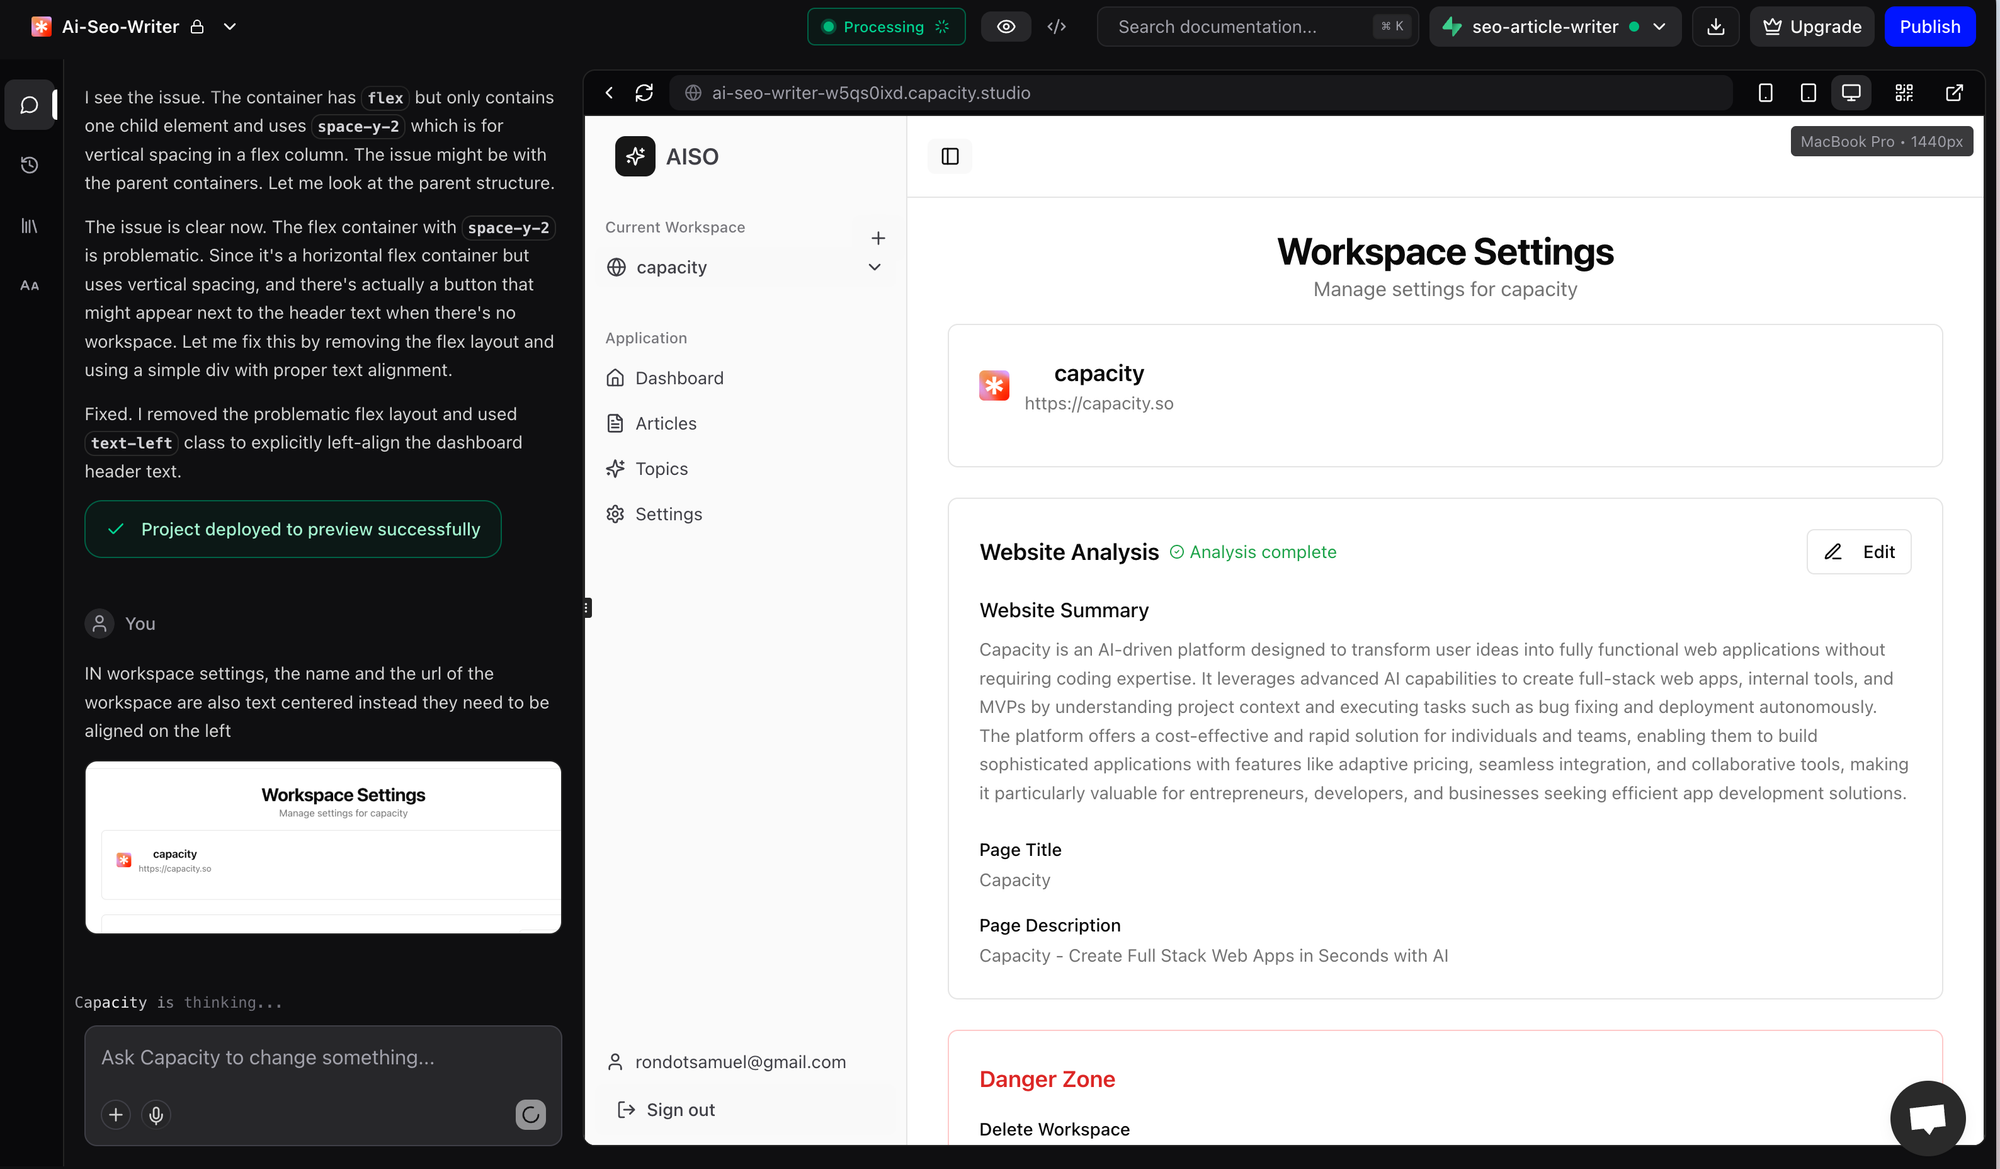
Step 3 — Workspaces
Each user should manage multiple websites. I asked for a Workspace model.
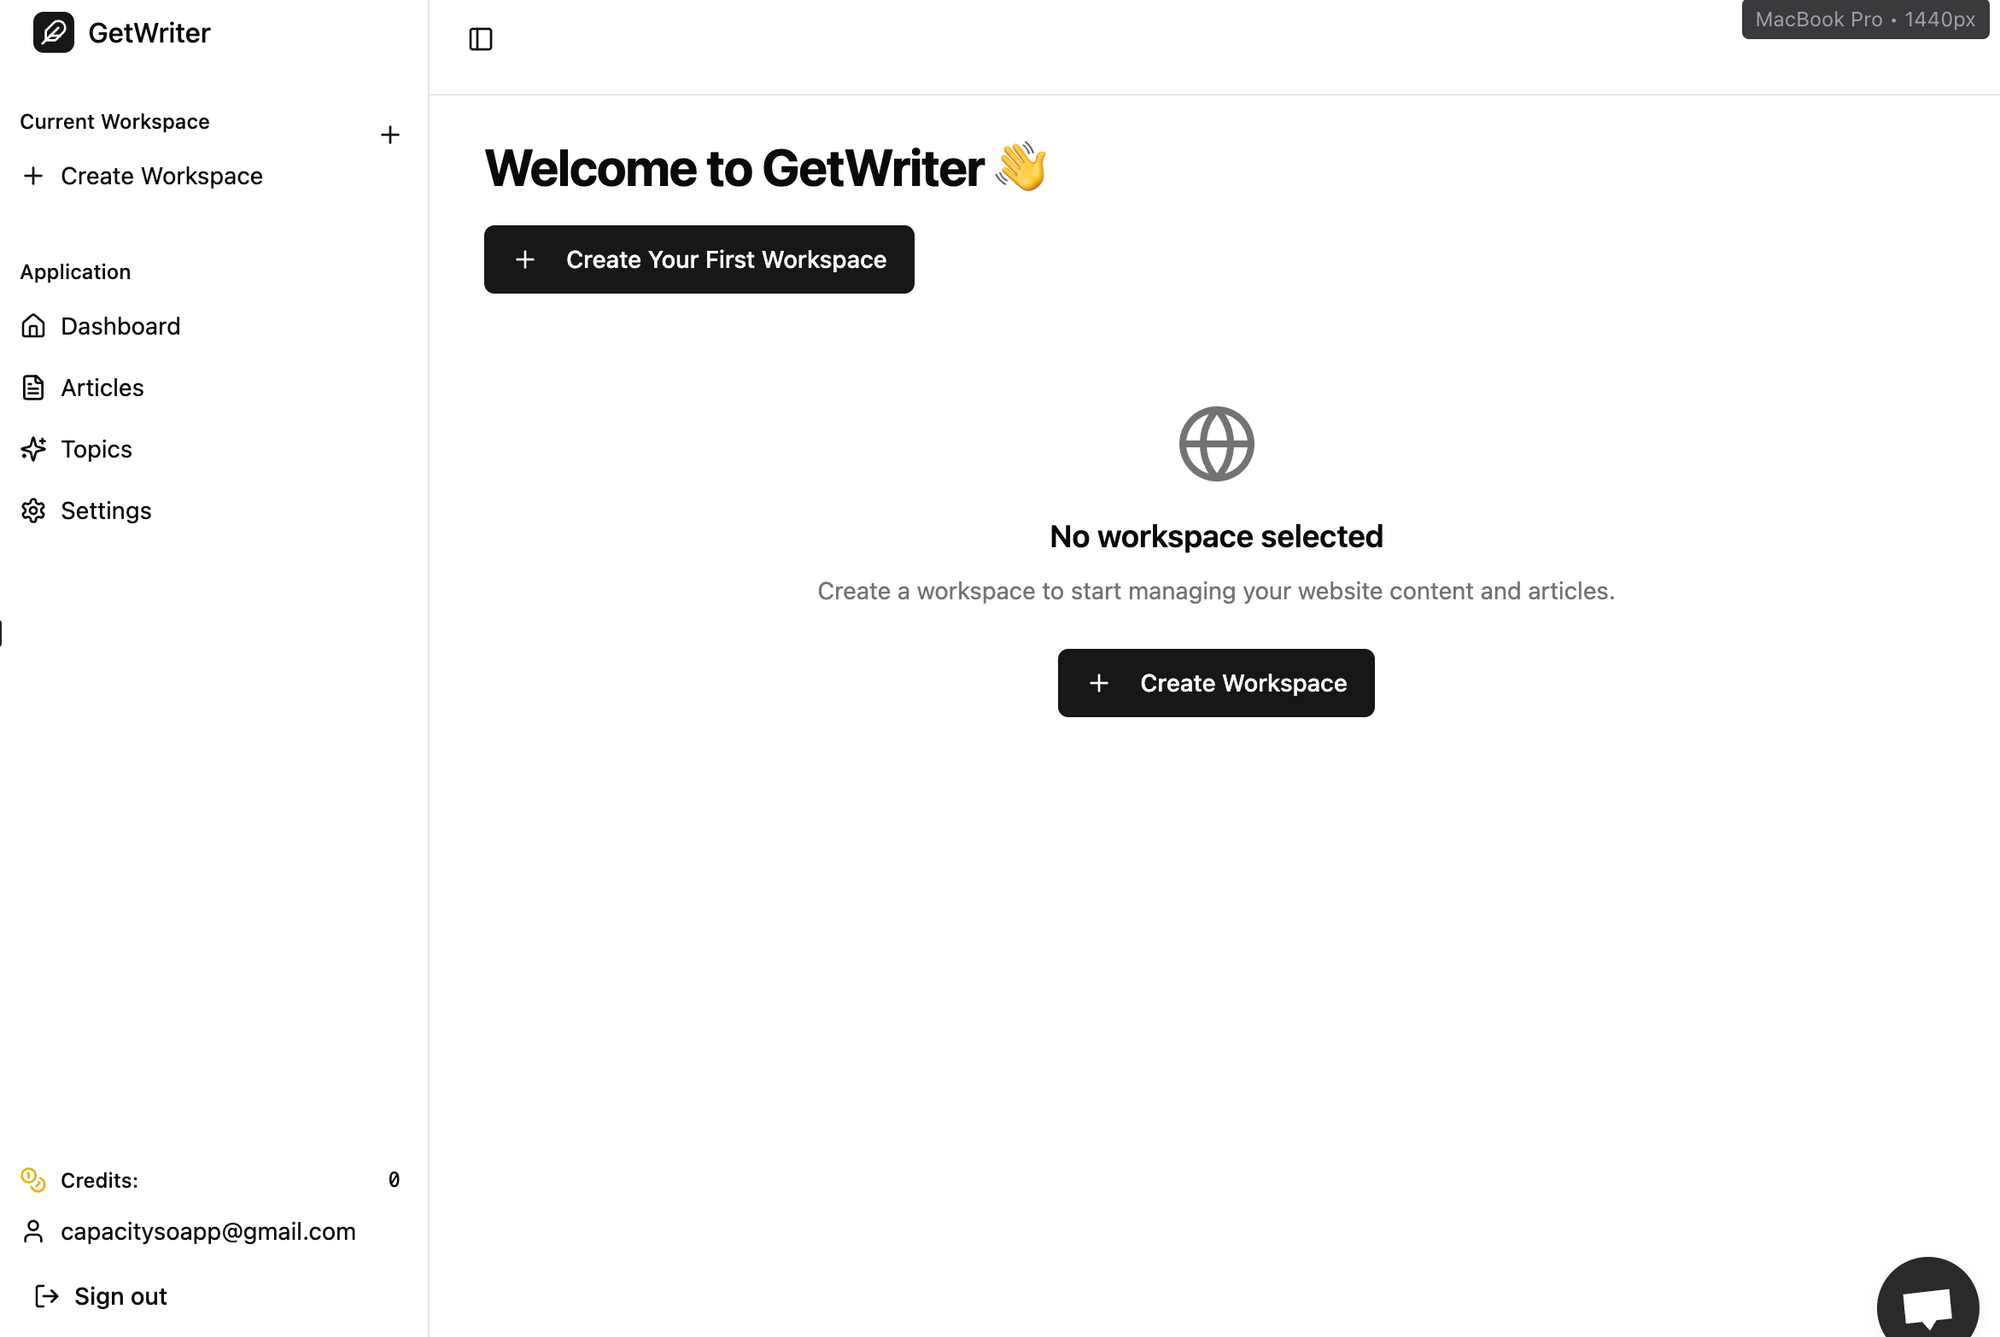
Prompt:
Create a Workspace feature.
Each workspace represents one website.
Users should be able to create, select, and switch between workspaces in the sidebar.
Capacity created:
- A
workspacestable in Supabase - Sidebar workspace selector
- Workspace creation flow
Step 4 — Website Analysis (Automatic)
When a workspace is added, I wanted it to feel instantly useful.
Prompt:
When a workspace is created, run an Edge Function that:1. Fetches the website content and metadata metadata2. Saves the favicon into Supabase Storage
3. Generates a summary with Openai 4. Stores everything in the database
Result: new workspaces show site info, favicon, and an AI-generated description automatically.
Step 5 — Article Creation Flow (Keyword → Title → Plan)
Before generating full articles, I wanted users to have a proper article creation page where they:
- Enter a target keyword
- Generate a suggested title with AI
- Generate an outline/plan with AI
- Edit the title/plan manually if they want
- Then launch full article generation
Prompt:
Create a page inside the dashboard for creating an article.Features: target keyword
- Input for- Button to generate a title with OpenAI (using Edge function)- Button to generate an article outline/plan with OpenAI (using Edge function)- Editable fields for title and plan- Button to "Start Generation" that triggers the full article job (we will implement that later)
Capacity scaffolded:
- A new page in the dashboard under the selected workspace
- Keyword input + AI title/outline buttons
- Integration with OpenAI for suggestions
- Editable text areas so users can tweak before confirming
- A “Start Generation” button that hands off to the queue system
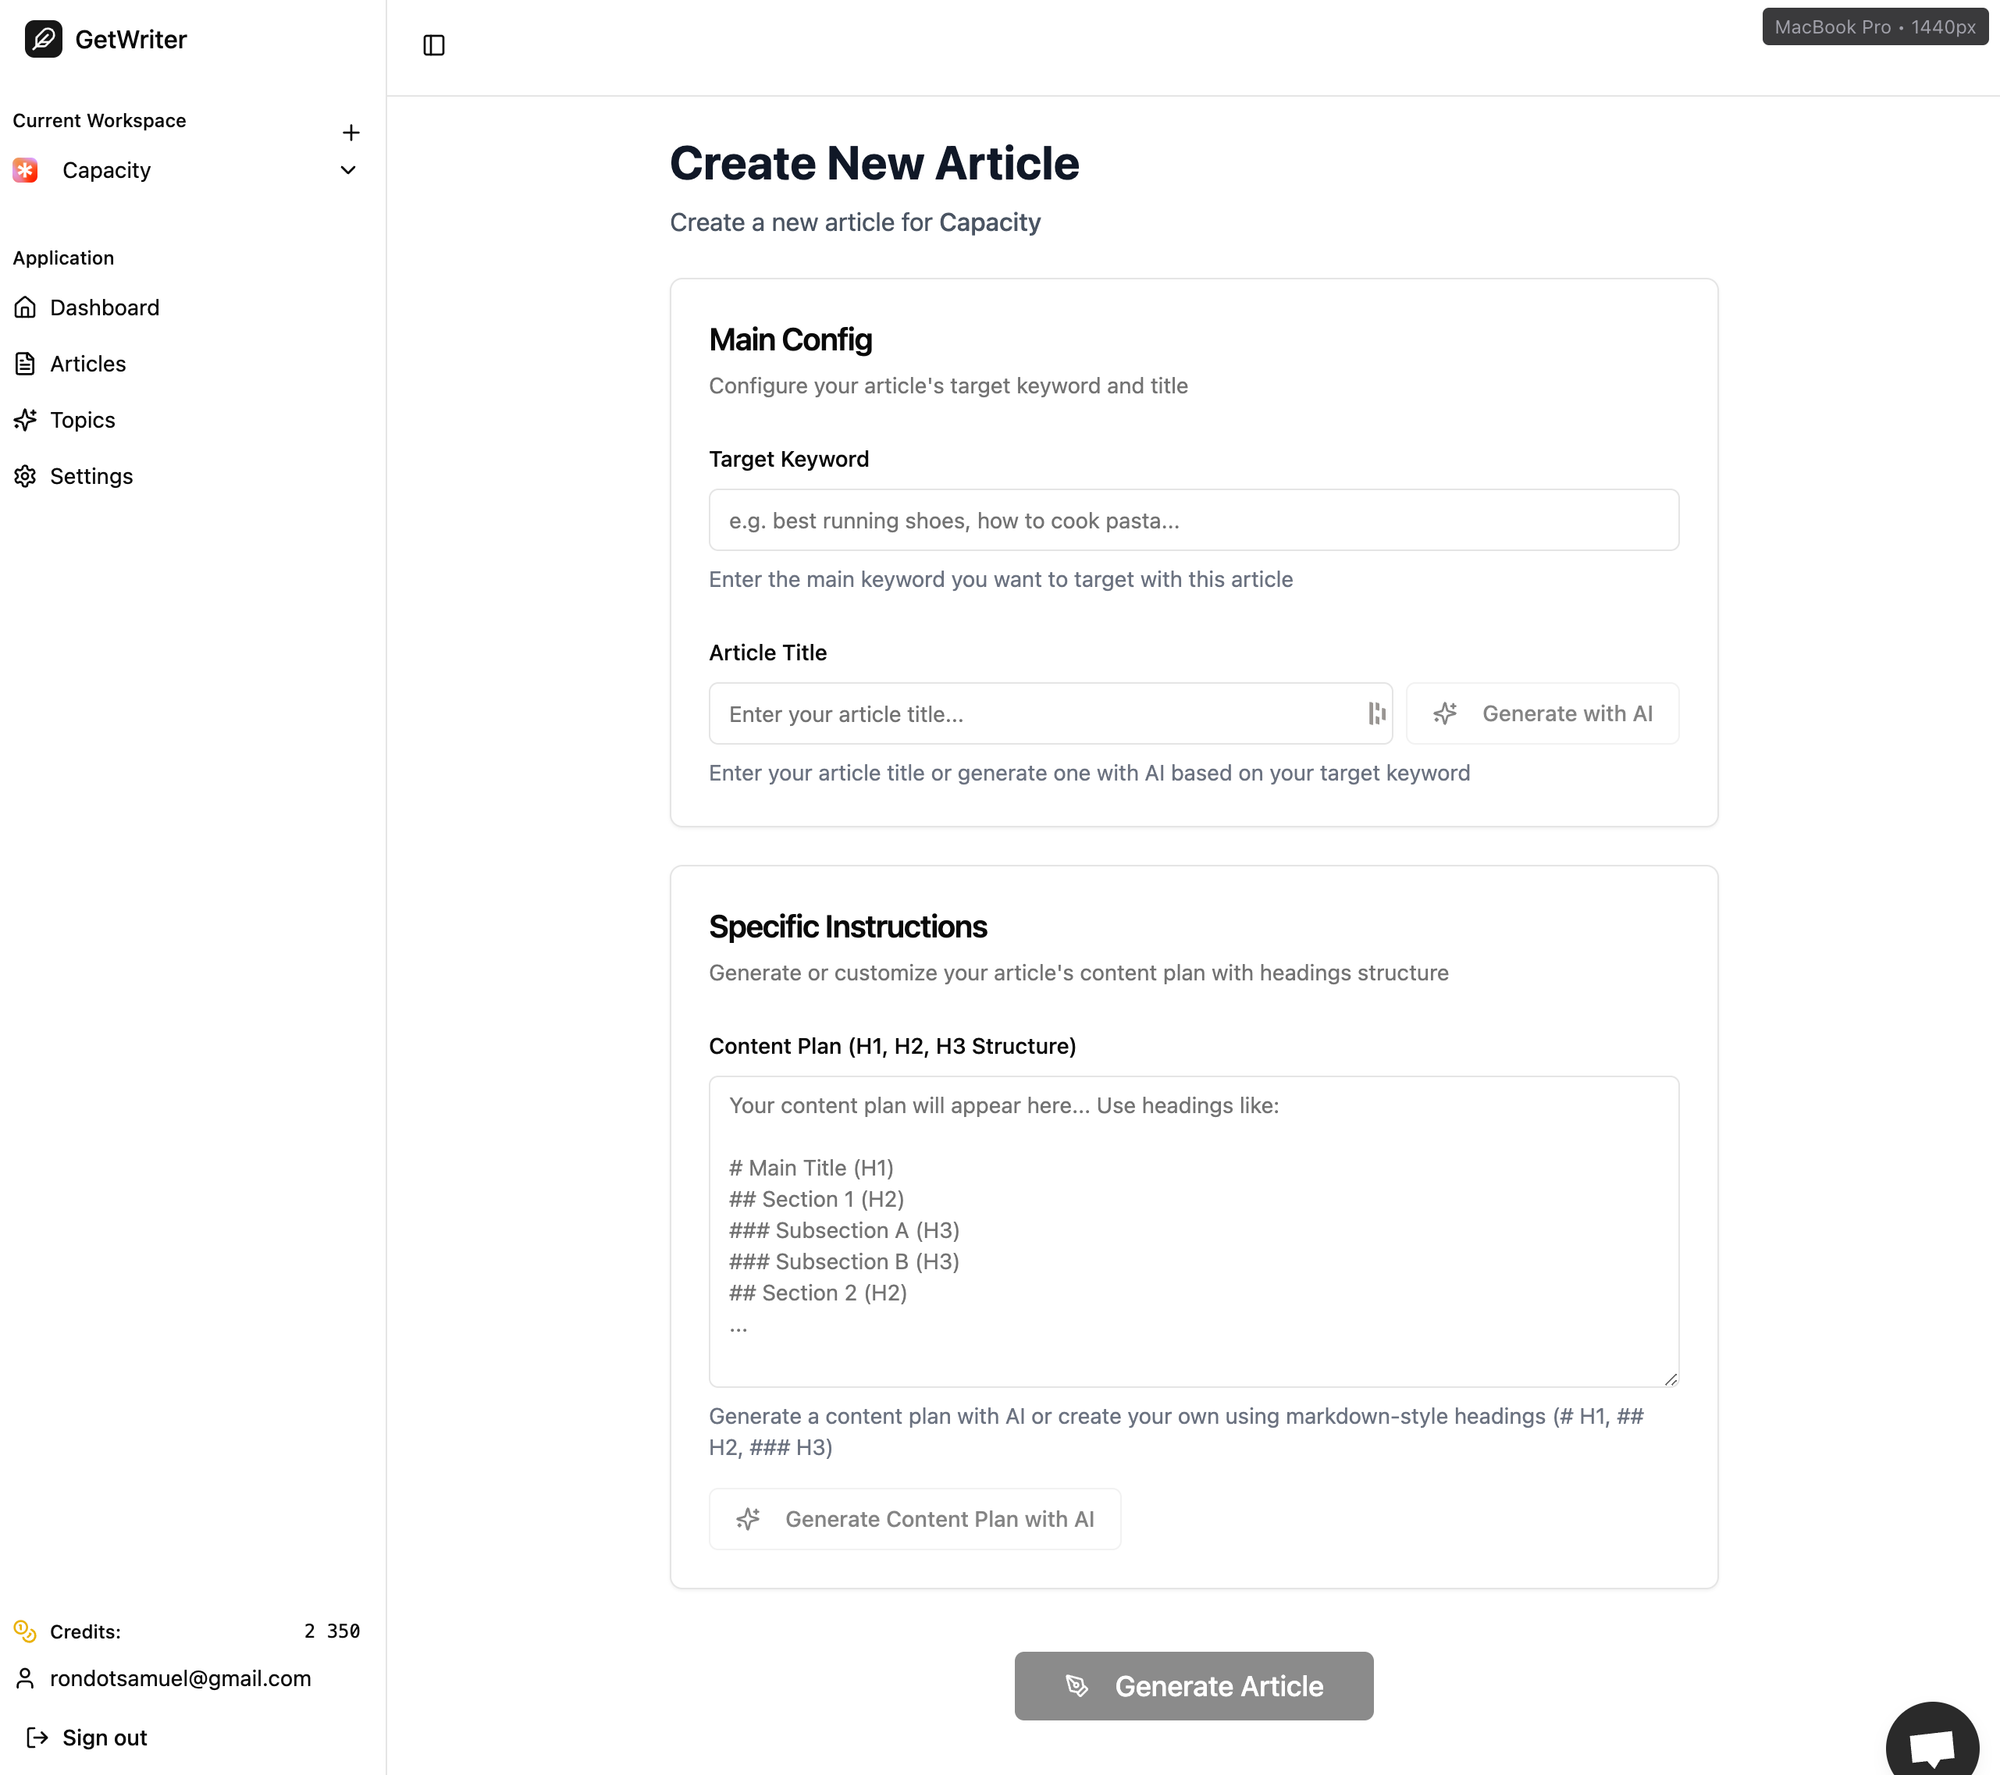
This gave me a real editor-like UX, instead of instantly jumping into background generation.
Step 6 — Long-Form Article Generation
That was the tricky part. Generating a 3000-word article in one request would hit Supabase Edge Function timeouts (30s on free plans).
Capacity suggested a queue solution.
Prompt:
I want to generate SEO articles section by section.
The article must be split by H2.
Use PGMQ and pg_cron to create a queue.
Add an "article_generation_jobs" table to track progress. Split article generation into multiple edge functions:
-enqueue-article
-process-article-section
Frontend should poll job status until complete.
This gave me:
- PGMQ queue
- Cron-driven workers
- Job tracking table
- Reliable background article generation
Note: I also copy-pasted the PGMQ docs I linked above into the chat to make sure the AI used it correctly.
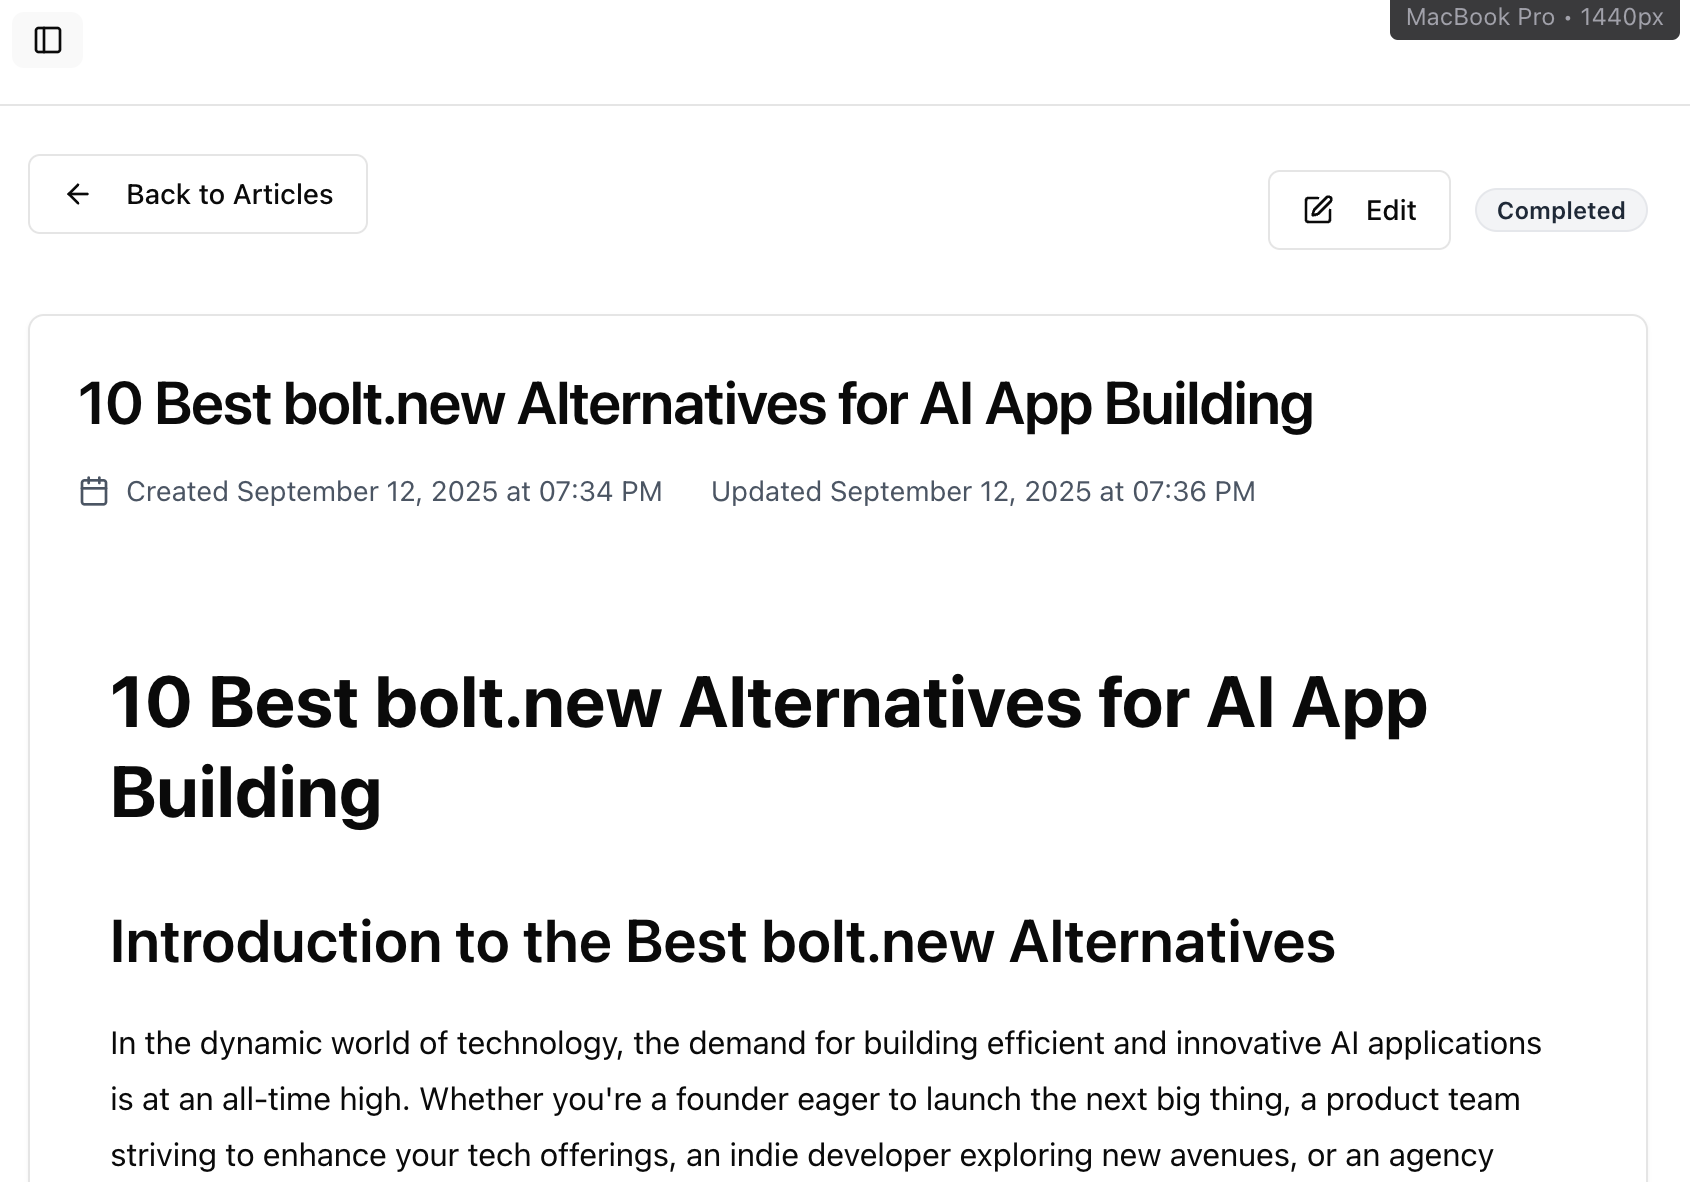
After a few iterations, I finally managed to get exactly what I wanted: SEO articles that target a specific keyword and follow a specific plan.
Step 7 — Stripe Credits System
Finally, I implemented Stripe to accept payments and deduct credits each time an article is generated.
Prompt:
Integrate Stripe Checkout.Each plan gives credits (e.g. 10 credits = 1000 words).
After successful payment (Stripe webhook), add credits to the user account.Show remaining credits in the dashboard. Deduct 100 credits per article generated.
Note: I wrote a comprehensive doc on how to integrate Stripe with Capacity, but the key here is to disable JWT verification on your Supabase Edge function that handles webhooks. Otherwise you will end up with 401 errors.
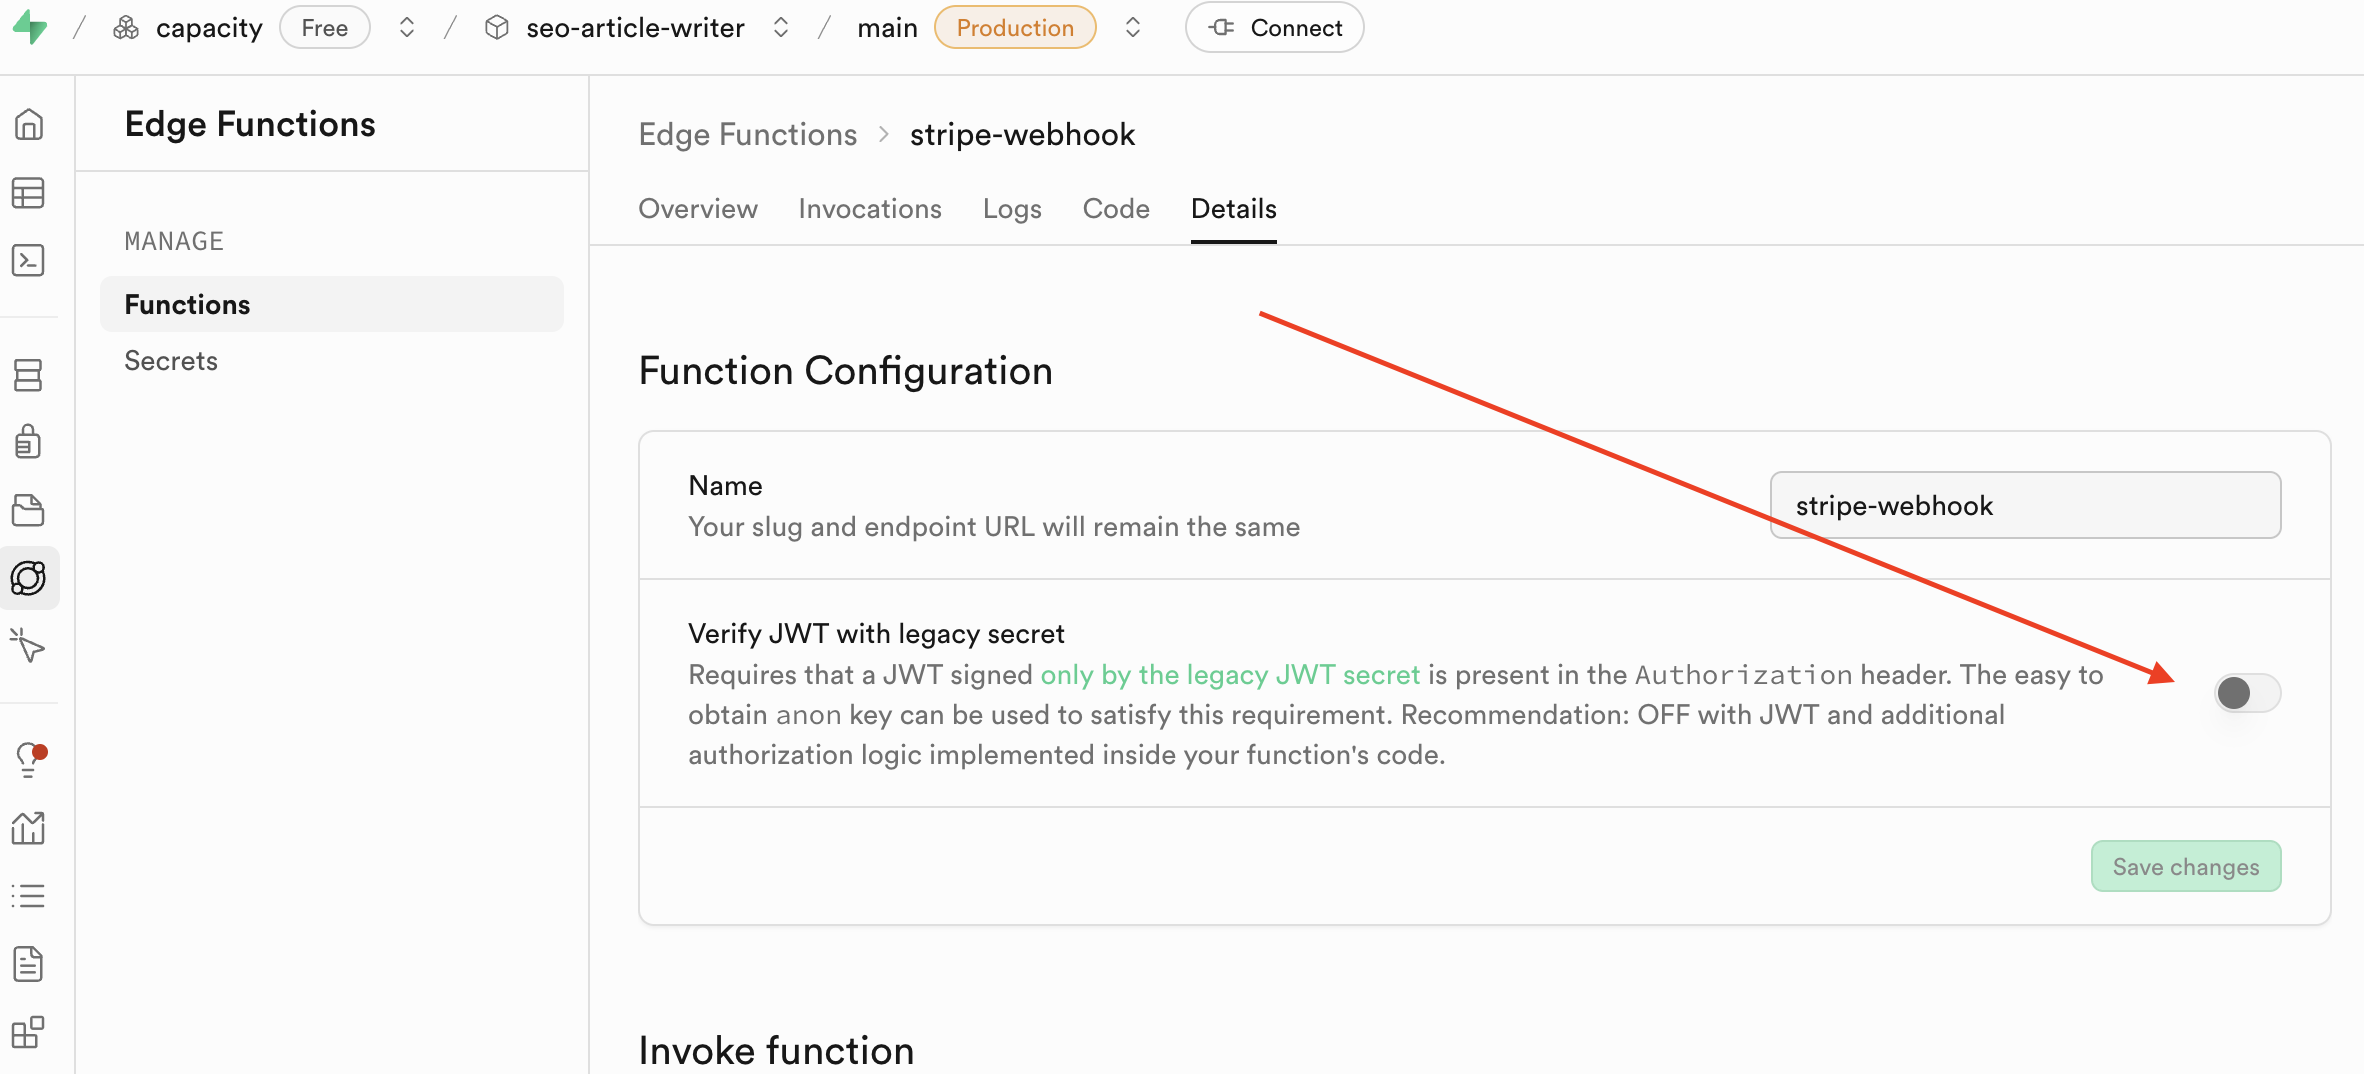
Capacity implemented:
- Checkout Edge Function
- Stripe Webhook
credit_transactionstable- Credit balance in dashboard UI
Step 8 — Article Cover Images With Replicate
To improve the app further, I wanted to automatically generate covers using AI.
I went with Replicate and the model bytedance/seedream-4 for its ability to write text, which is perfect for article banners.
Prompt:
Add an option to generate images for articles. Use Replicate (https://replicate.com/bytedance/seedream-4) to create illustrations. Save them and attach them to the article in the dashboard.
What I Ended Up With
In less than 10 hours, I had a SaaS that:
- Lets users sign up and log in
- Creates workspaces for their websites
- Auto-analyzes sites with AI
- Generates long-form SEO articles with queues
- Generates article banners with AI & Replicate
- Bills via Stripe credits
All built through iterative prompts in Capacity.so.
Lessons Learned
- Start with the landing page. It sets the design baseline.
- Think in steps. Each feature = one clear prompt.
- Queues beat timeouts. PGMQ + pg_cron inside Supabase kept things reliable.
- Credits > subscriptions for clear user value.
- Ask Capacity directly when you don't know how to do something.
Takeaway
I didn’t write the app. I guided it into existence with prompts.
That’s the new way to ship SaaS fast.